https://www.youtube.com/watch?v=k-wS9hGiyU8
How to Make a FREE Restaurant Food Ordering Website With WordPress in 1 HOUR! [DELIVERY AND BOOKING]
Welcome party people .
My name is Darryl Wilson .
And today in this video , I'm gonna show you all how to create a simple and convenient online food ordering website with wordpress .
Now , in this video , we're gonna use a bunch of free tools to help you create your own online food ordering websites .
Now , this is , is perfect for pretty much all small business owners who don't want to spend a lot of money with their websites or just for anyone out there who wants to accept payments and orders through their websites .
Now , I know small business owners are struggling with costs .
So in this video , I'm gonna show you how to make this same website with a free builder , a free theme and a free food delivery service app .
It's amazing .
And if you're a complete beginner good because we are using a dragon drop builder that's super easy to use .
And the best part is it's completely free .
So go get a coffee and grab a seat and let me show you the website we're gonna make today and also what you're going to learn in this video .
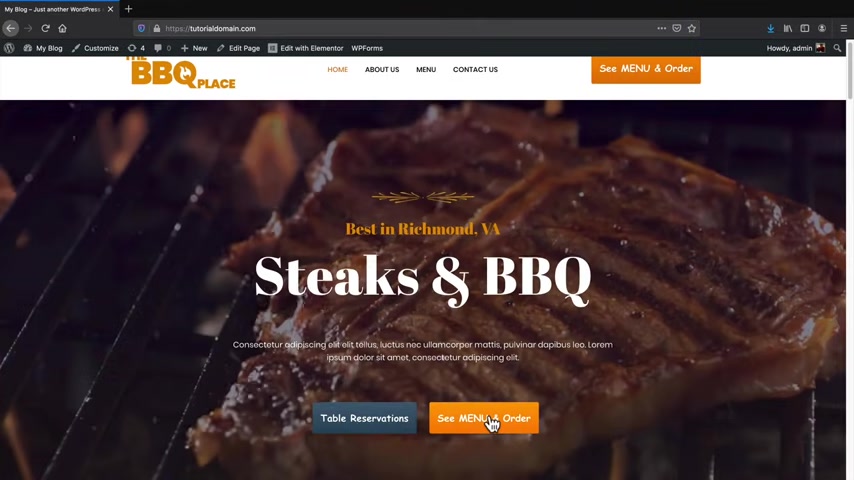
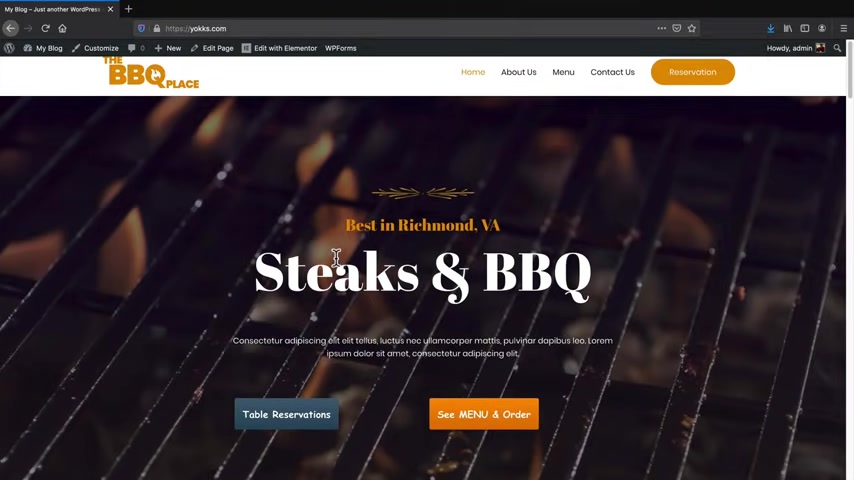
So here is a website that I'm gonna show you how to make today .
Now , it doesn't matter what kind of an industry you're in .
There is a template in style for pretty much every single food industry out there .
So I'll be showing you all of those free templates today in this video .
So for example , the customers will come to your website and say , you know what I wanna order something .
So let's take a look at the menu .
So right here , I will click on the menu and then the menu will display .
So it doesn't take them to another page .
It displays it right away for them .
So here we have this picture of this burger .
We have another burger and we have uh salads and sides .
So essentially these are categories .
So for example , we have burgers , salads , sides and drinks .
Now , if you are in something like a Mexican restaurant , this can be tacos burritos , Tosta and maybe soups , you know , uh posole or something like that .
So let me go ahead and click on one of these burgers .
So let's click on , let's click on the classic burger .
Let's order something here .
So we have different sizes .
So for example , they can make it a combo right here .
You can , you know , add like a $2 combo for a Coke and chips or Coke and French fries .
And also they can have add-ons .
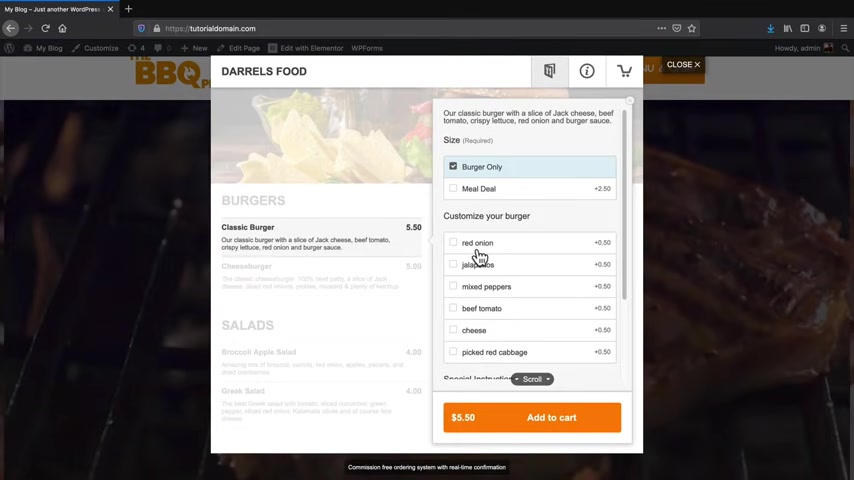
So this would be something also for like Asian restaurants where if they wanna add chicken or add uh , mushrooms to their order .
They can , you know , they can add it for a dollar more .
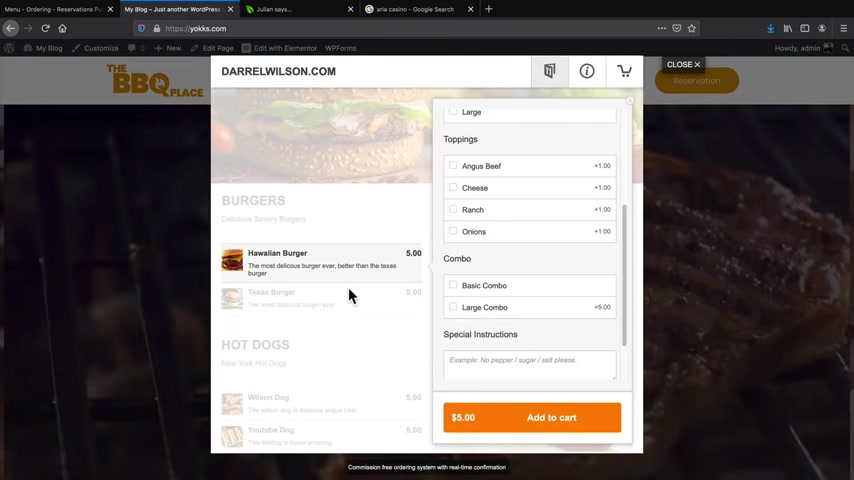
So I'll just , uh , add all these because I'm hungry and then special instructions .
So , let's say , for instance , maybe someone's allergic to a hot sauce or something like that , you know , we'll just put a no hot sauce , you know , or something like that .
You , you get the points and I will add this to the cart .
Now , this is a live website where we can take payments right away on this website .
So I will be checking out and showing all of you that .
This is a live real website that I said credit cards .
Next , we have this little I button right here .
So this section right here will display the delivery fees and it also shows them the radius .
So for example , if you don't want to deliver really , really far away , you can basically tell people saying , look , guys , we'll only go maybe five miles from our restaurant , but anything past five miles , it's just too far and it's just not worth it time .

So you can go ahead and add delivery fees and also add in a minimum .
So you don't want your customers ordering like $3 worth of food and then expecting you to deliver it .
So , uh , you can set minimums and you can also set fees as well .
You can also show them the delivery times where you deliver .
We have table reservations the payment methods .
So people can order with cash card and they can do card with delivery or pick up here .
They have the phone number and we also have opening hours .
Now I put 12 to 12 because this is 24 hours .
So if you deliver 24 hours , uh that's what you would put , but you could do something like , you know , 10 to 8 o'clock or something reasonable .
This is probably not reasonable .
But then again , doughnut shops , they open 24 hours , which is interesting .
And let's say , for instance , you want to change the language , you can change it to uh Dutch or you can change it to English or Spanish or Italian or whatever language that you speak .
So that's pretty cool .
So let's go ahead and check out .
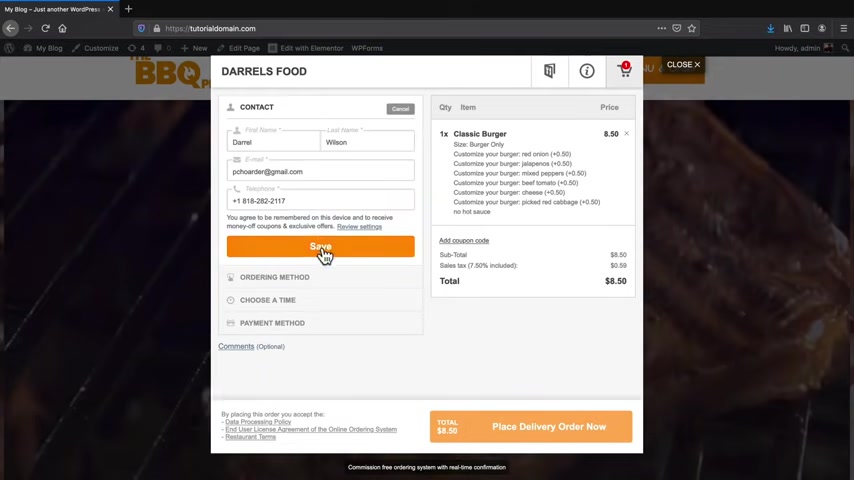
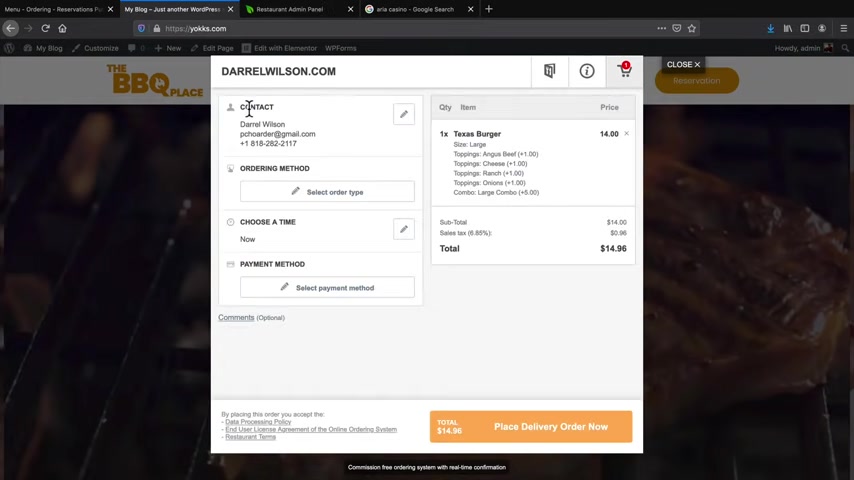
So here I'll click on the carts and I'm gonna go ahead and put in my contact information .
So on the top right here , your customers will be prompted to put in their contact information .
Once they fill it out , they will click on save the ordering method .
We can click on this and say , well , I can pick it up , I can deliver or I wanna , you know , order a table reservation .
Now , one thing to note here is that you can accept the payment right now on the website or when they come and pick it up , it's really up to you .
And in this video , I'll give you the options of having both just in case you want to maybe charge them on your website or you can charge them later and then here we have the payment method .
So what's really cool is that I was already running test payments and the credit card will be stored on the website so they can come back and keep purchasing more and more of your food without having to find their credit card .
Uh You know , maybe they got , maybe they lost it .
So it's a very convenient process .
So I'll go ahead now and place the order for pickup .
Now .
What's really cool is you as the business owner will be able to approve this or you can even decline it .
So for example , if someone orders something really , really big , you can decline it and give them a call saying , hey guys , now it's really really big .
So we don't have that available and you can always give them a phone call .
So it's really cool .
You can actually approve orders directly on your smartphone or your mobile device .
You can also go ahead and print those orders and connect it with wifi to any thermal printer or any printing device .
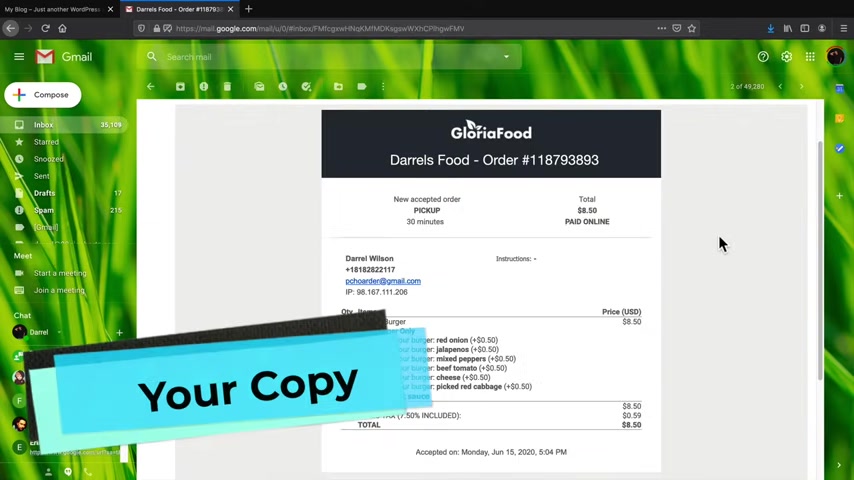
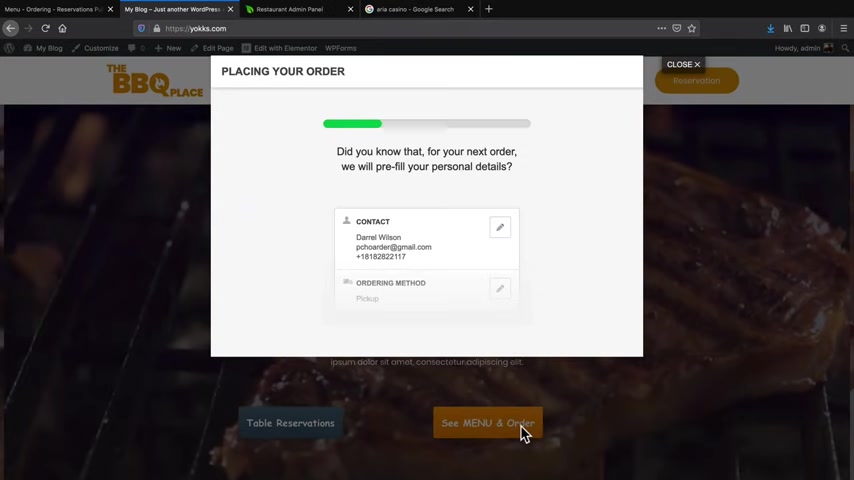
And then once the restaurant confirms the order , it'll let them know in their email that the order was confirmed .
You will get a text message and you will also get an email notifying you of a new order and someone has purchased something on your website .
So then the customer will get an email from you automatically notifying you that you purchased the order .
And they will also get a purchase receipt and you will also get an email notifying you that someone has purchased something on your website .
So it'll give you the information about the customer , let them know it's for pickup and also show you how they paid as well .
Now , what's better than an online food ordering system .
A beautiful website , people will not buy anything unless you have an amazing website .
And today in this video , I'm gonna show you all how to just create an amazing and beautiful looking website .
So this is using a drag and drop builder .
So you don't need any sort of experience whatsoever to create this website .
And we're gonna go ahead and import this website as a template .
So you have your website up and running in a few clicks making it really easy for you to get started with your new website .
So if that doesn't impress you , well , I think you're impressed .
So let's go ahead now and move on with this tutorial .
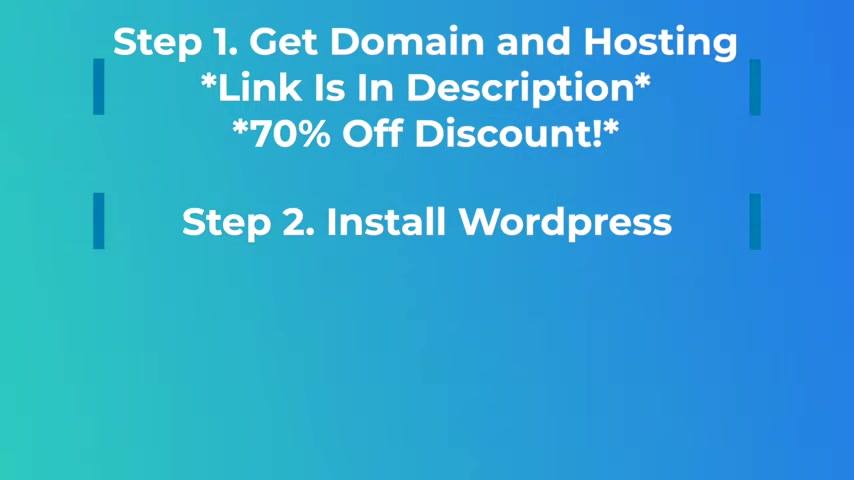
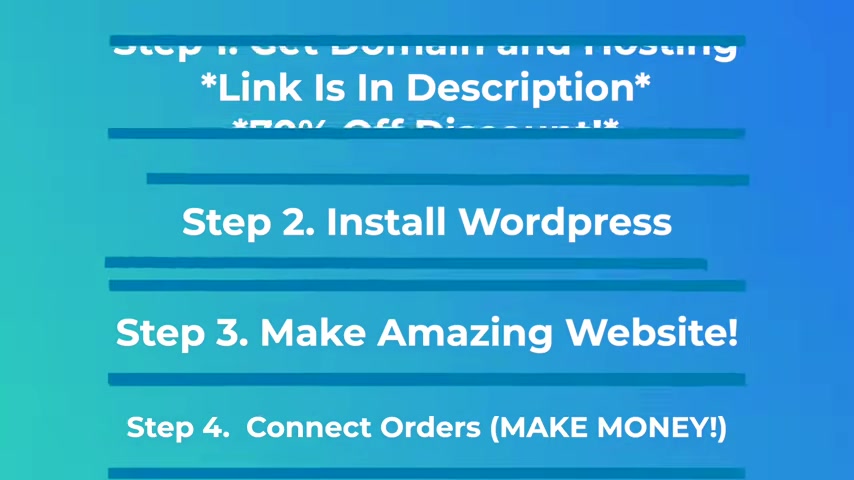
So step one , we get your domain and hosting .
So for example , my amazing restaurant dot com , step two , we install wordpress and Wordpress is free and it's also the most popular platform for making websites .
And step three , we're going to go ahead and build out your amazing websites and step four , you're gonna make some money , you're gonna make money .
Now , there is a link in the description of this video .
It'll take you to a page that looks just like this right here and this right here is Sgro dot com .
Now , you've seen my other videos , I've been recommending sar dot com for almost four years now .
And that's because pyar dot com came up as the number one as the fastest with the best up time when you're hosting your website .
So I tested 15 other companies and came up with a low time of around 1.8 seconds .
So you can be searching that your website will be very fast compared to other web hosting providers .
So we have three plans right here .
We have the startup .
We have the grow big and the go geek for most of you , you probably want to go with the grow big plan because with the grow big plan , you can host unlimited websites and you get a little bit more space rather than just a single website .
So you can see the difference right here .
And personally , I don't think you need the go geek just yet .
Uh That's for people like myself who are , who , who have a lot more websites and stuff .
So right here under the grow Big plan .
Click on Get Plan .
All right .
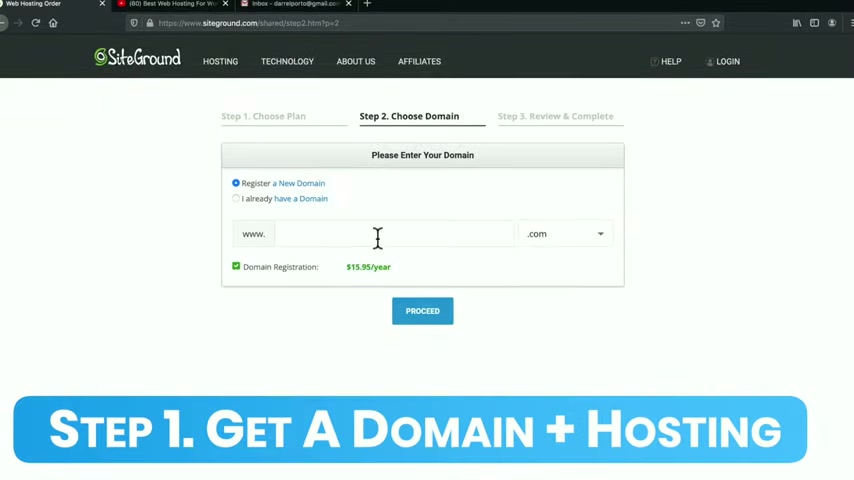
And right here you're gonna give your website a new name .
So go ahead and talk it over with your friends or your buddies and give it some thoughts because this is going to be your new web address .
So for this tutorial , I'll just do something like a website tutorial Darryl dot com .
And then right here , I'll click on , proceed .
All right , cool .
And this right here is the checkout page .
So right here you'll put in your account information and then here you'll put in the client information , like your first name and your last name .
And then here we have the payment information so you can pay with credit card .
And then also here you'll put in your social security number .
I'm just kidding .
No , social .
Just kidding .
Uh Right here is the purchase information .
So right here we have a period and I recommend doing 12 months because 12 months will actually give you enough time to decide if this is for you or not .
And you also get the largest discounts with 12 months .
And remember there's a 30 day money back guarantee for any reason whatsoever .
And then here we have extra services .
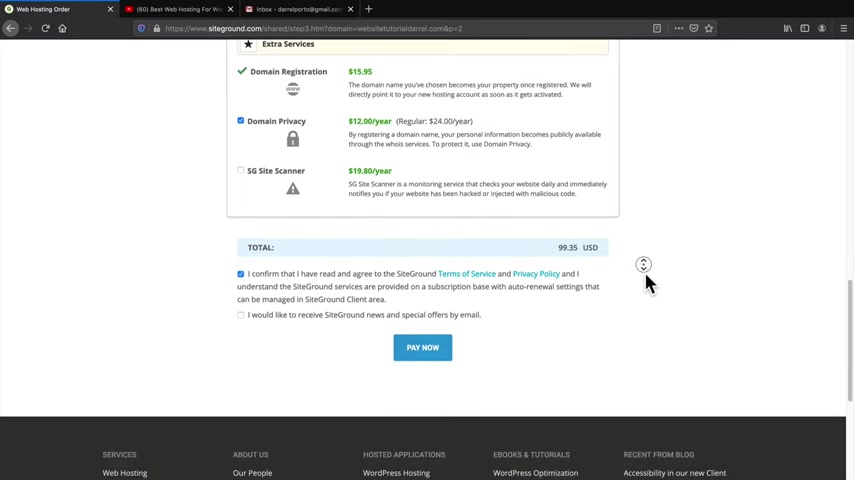
Now , I require you guys to check on this domain privacy .
The reason why is because if you don't have domain privacy checked , you're gonna get all these unsolicited emails and spam trying to sell you Viagra sex pills and seo packages and all this really weird stuff that you don't want .
So if you have this check , this will protect your personal information .
So make sure you have that checked right there and then going down here we have the terms of service and privacy policy .
So make sure you have that checked .
So once you're all set , click on pay now and I'll meet you on the very next page .
All right , cool .
So after you've purchased hosting , it'll take you to this page right here and then right here , click on , proceed to customer area .
All right .
Awesome .
So to set up your website right here , just click on set up sites .
Now , right here , we have two options .
We have start a new website and migrate website right here .
Just click on start a new website .
And right here we have four options , but we want to select wordpress .
So click on wordpress here , you'll create some login credentials .
So make sure you write this down because you're going to need this information every time you log in and make changes to your wordpress website .
So I'm gonna go ahead and put in an email address and a password .
All right .
So I'm all set and right here , once you're done , you'll click on continue .
So right now it's asking us if we want to add this to our plan .
Uh Personally , I don't need this right now and I don't think you do either .
So I'm gonna skip this and just click on finish and that's it .
And right now sy ground is setting up your new website .
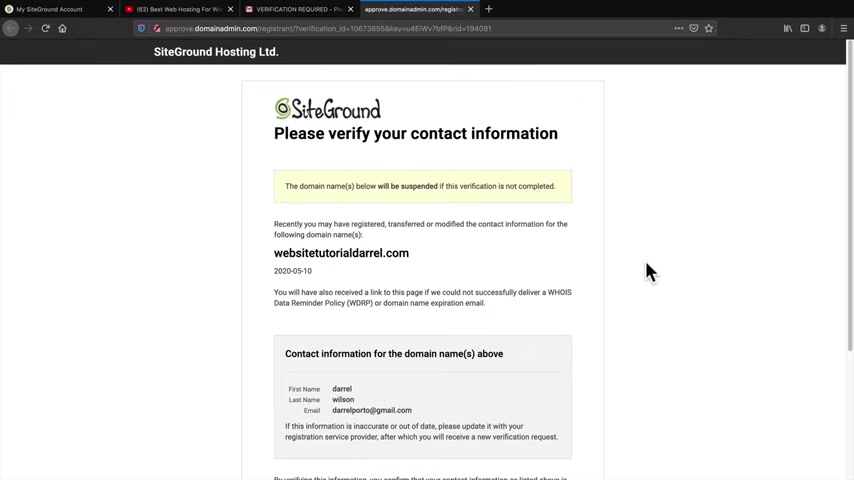
Make sure also to check your email because you're going to get an email from Sgro saying verification required , open up this email right here and you're going to verify the domain that you purchased .
So right here , you'll have this link .
So click on this link and then I'll take you to this page right here and you need to verify your domain .
Basically saying that you're a real person , not some robots or else they're going to suspend your domain .
So all you need to do right here is just click on verify information and you're done , your domain is verified .
All right , cool .
So the website has been successfully installed and we are all set .
So right here , click on manage site .
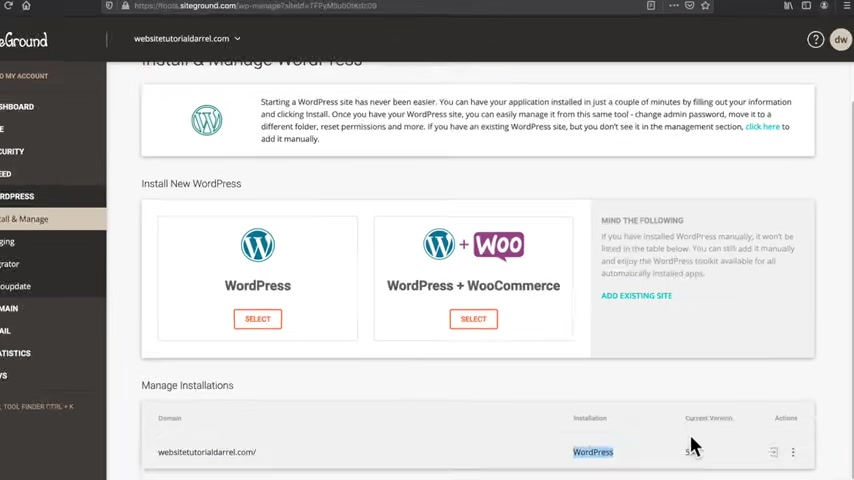
So this right here is the site ground dashboard .
So on the left side , right here , you'll see wordpress , click on wordpress and then click on install and manage .
So this right here is going to show the installations of wordpress that you have for your website .
And right here on the bottom , we can see our website .
And then right here you can see that Wordpress has been installed right here under actions on the bottom , right ?
It's gonna say log into admin panel , click on , log into admin panel .
All right , cool .
And it'll take you to this page right here , but I don't really want to go through the setup wizard .
So on the bottom right here where it says exit , click on exit and congratulations .
Your website is now live on the internet .
Now , if you want to see your website right now on the top left , right here , you'll see , uh , my wordpress , just click on visit sites and this right here is your new website .
It's a little plain , it's a little boring and it's really ugly .
So we need to make a lot of changes to it .
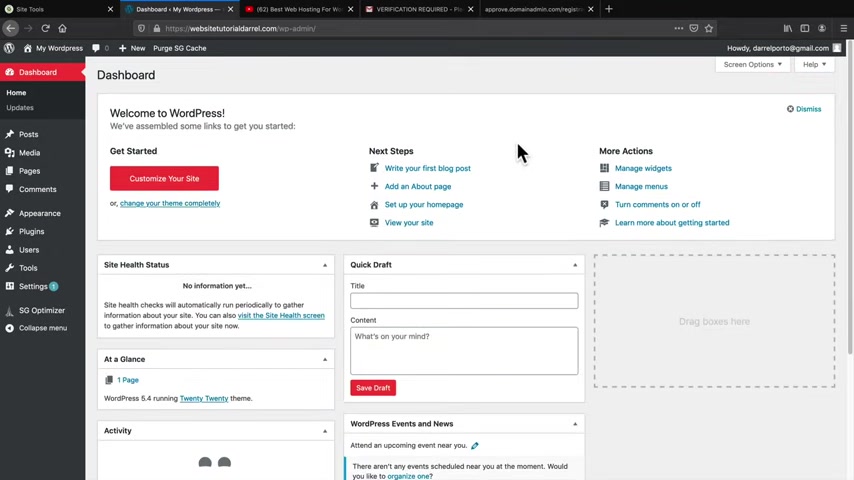
So , before we go into the design process and start building our website , we need to change some general settings .
So right here under my wordpress , let's go back to the dashboard .
So the first thing we'll do is disable this plug in right here .
We don't need this wordpress starter .
So right here in your plugins , click on installed plugins , you're gonna get very familiar with plugins as this tutorial goes on .
But uh right here we have wordpress starter .
Go ahead and deactivate the wordpress starter .
All right , cool .
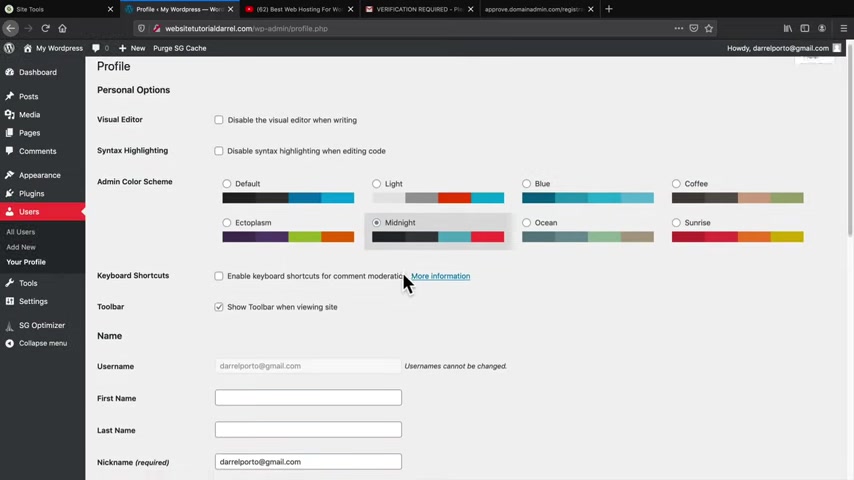
Next , let's go right here to users and go to your profile .
So in the future , if you want to change something like the color or your email or your password , this is where you're going to do it .
So right here , I'm gonna select midnights .
I like midnight .
I feel like midnights .
Uh , I don't know .
I like it .
You can go to these other ones and see which one you like scrolling down here .
So if you ever want to change your email , this is where you're gonna change your email and that's pretty important because that's what you're going to use to log into your website and then right here we have the generate passwords .
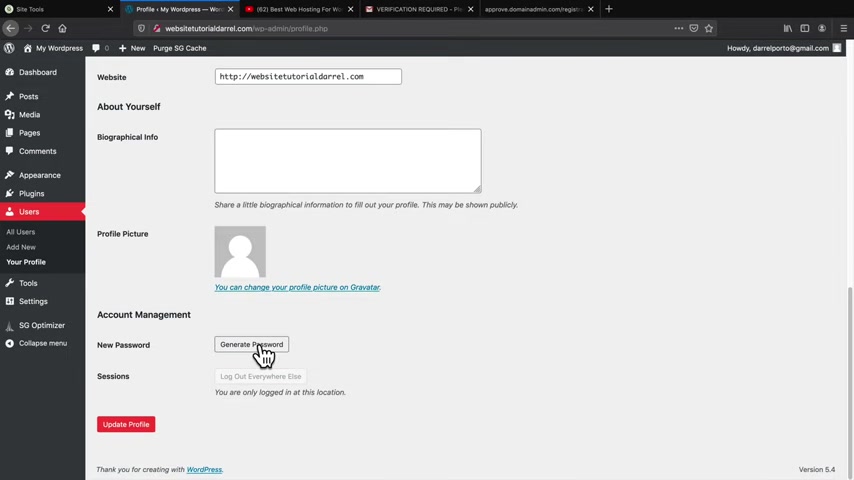
So if you ever need to make a new password , this is where you're going to do it .
You can just click on generate new password and then just go to update profile and you're all set .
Ok .
Cool .
Another thing I wanted to let you know is that if you speak a different language right here in our settings in general , you can actually have the back end , change the text right here to your specific language .
So many of my viewers asked me about a plug in for that .
And I said , guys right here , it's in the site language .
So right here , you can select any language and they have pretty much any , I think they have every language out there , they have a lot of languages so you can select your language and then once you're done , you'll click on save changes and it'll apply throughout the entire back end .
Now , there's two more things that we need to change right here under Perma links , we need to change our Perma links and I'll explain what this is .
So right here , we have our Perma link settings and you want to have it under post name .
The reason why is because when someone comes to your website , like for example , your website dot com dash about us , right ?
Not a bunch of numbers and a really ugly Perma link .
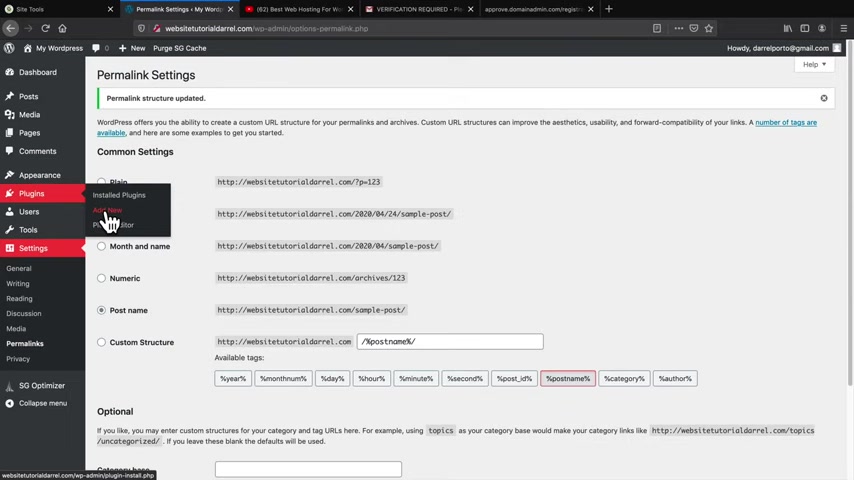
So post name is the best for SEO and it makes your site look a lot more cleaner .
So once you click on post name right here , click on save changes .
Next , we need to fix this SSL right here .
So you notice right here on the top of your website how this says connection , not secure .
And if you go to other websites like Google , you're gonna see that this is a secure connection .
So we need to change our connection to a secure connection .
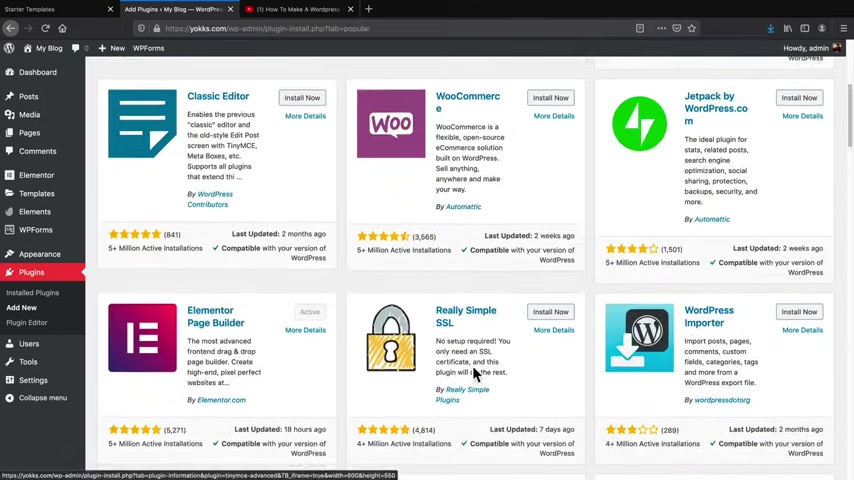
So we just need to install a free plug in right here in our plugins .
Click on , add new .
What plugins are guys , they're essentially applications for your website .
So there's an application slash plug-in for pretty much everything out there , just like your iphone .
So right here under search plugins , you'll type in really simple SSL .
I'm not kidding that , that is the name of the plug in really simple SSL .
And this right here is a plug-in that you need .
It has 4 million active installs right here .
Just click on install now and then you'll click on activate .
All right .
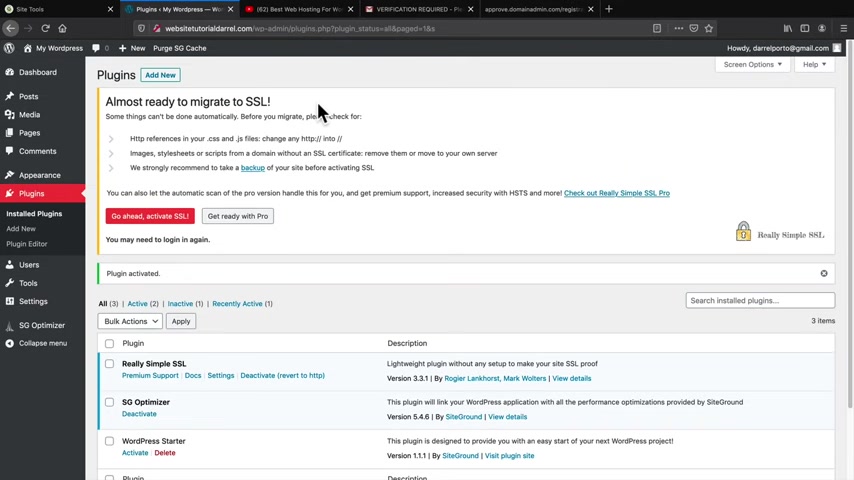
So right here , it'll tell you that you're almost ready to migrate to the SSL .
Now , before you do this , make sure that you have your password and email written down .
The one I told you to write down because it's gonna kick you out of wordpress and you're going to have to re log in .
So right here , click on , go ahead and activate the SSL .
All right , cool .
So , on the top right here , you'll notice that the connection is secured .
Now in the future , I'm gonna show you now how to log in to your website whenever you want to make changes to your wordpress website .
So right here you'll see your domain name .
So what I'm gonna do is just go ahead and delete all this .
And right here you'll type in WP dash admin just like that and then you'll click on enter .
So this is the address that you need to type in every single time that you want to make changes and log in to your websites .
So right here , I'm gonna enter in my user name and my password .
Ok ?
And here I'll click on , remember me and I will log in .
All right , cool .
So all the general settings are done and your SSL has been activated .
So now your site is secure .
Now , as you guys use plugins and themes , you're gonna get notices from the developers , you can just close those messages .
They're just little things saying , hey , go give me a five star rating , etcetera .
So if you want to do that , you can do that , but you can always close the notices at any time .
Ok ?
So step three , let's start designing your new website .
So when you install wordpress , by default , you're given this really bland boring website and there's not a lot of design to it .
So we're gonna make it look amazing .
So first let's go ahead and install a wordpress theme .
So on the left side right here , under appearance , you'll click on themes and then under themes , you'll click on add new and you can click on popular .
Now , there's various themes that come with wordpress .
In fact , there's thousands of free themes that you can use .
I've used probably like maybe 20 or 30 of these themes and I've narrowed my list down to probably like 55 free themes .
Uh N is a good theme , but uh the one that we're gonna use is gonna be astra .
So this right here is a theme that we are going to use .
So you can go ahead and click on Astra also .
If you go to the top right here and just type in Astra , it'll actually display the theme right here .
So right here , I'll click on Astra , you'll install it and then you'll click on activate .
So I'm gonna click on activate and the wordpress theme has been installed .
Wow , it's a fast server .
So I'm not editing the video .
It's that fast .
Now , when you install Astra for the very first time , it's going to ask you if you want to import a demo website .
And uh yeah , sure , let's do that .
So right here , it'll say thank you for installing Astra .
We can go ahead and click on , get started .
So what we're installing right now is a plug in .
So what plugins are guys is basically add-ons .
It's like an application for your cell phone .
So here they're saying , go ahead and select the page builder .
Now , each of these page builders work in a different way .
But the one that we're gonna use is going to be element to .
Now Brizzi is also a very good page build that I recommend .
I've actually had videos on it as well , but we are going to select elementary for this tutorial .
If you guys want , I'll go ahead and do a tutor on Brizzi next time , but right here , I'll click on element to .
All right .
Awesome .
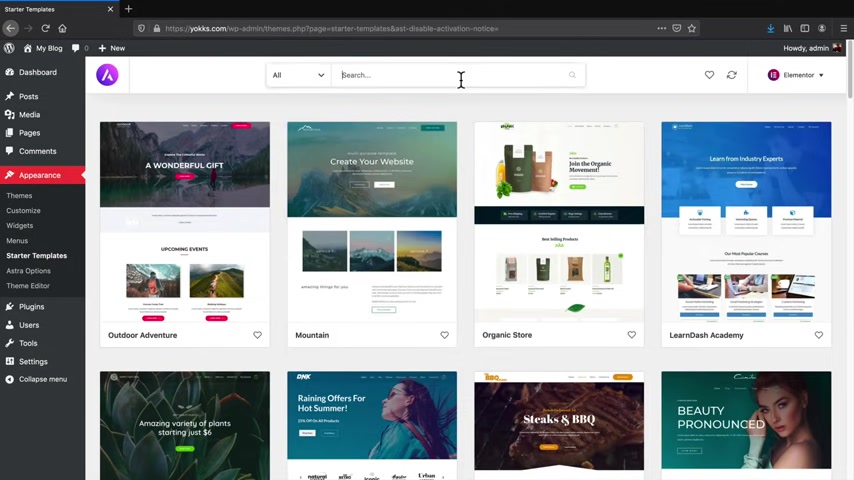
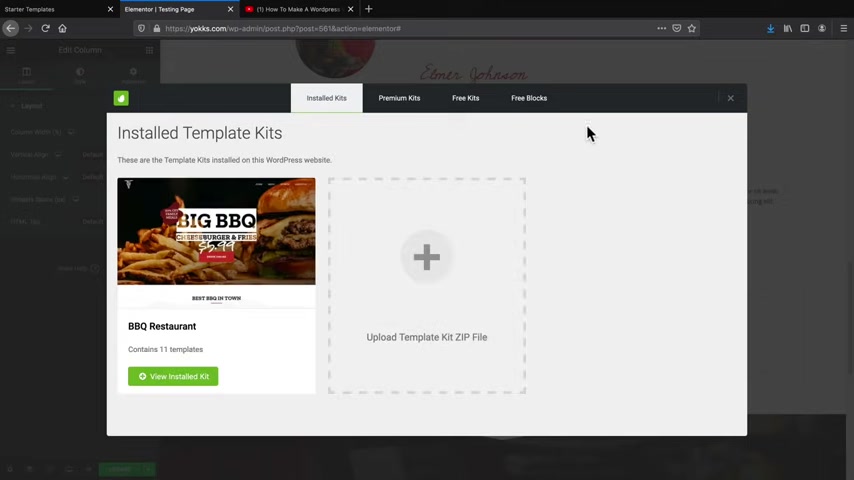
Now , there's a bunch of templates that you can use and these are at your disposal , you can use these for free and this will actually import the entire website for you .
So under this little arrow icon , if I click on it , I'll go click on free and these are free right here .
So these don't cost anything whatsoever .
Now , if you want to narrow down your search to even uh more right here , I'll just type in food and now we're given a list of four , but it looks like the Italian restaurant and the steaks and barbecue are probably the most idealistic .
So you can actually go through each and every one of those and take a look at them .
However , after we import this website , I'm going to give you an additional free resource to have even more templates and blocks at your disposal because I'm awesome and make sure to like this video .
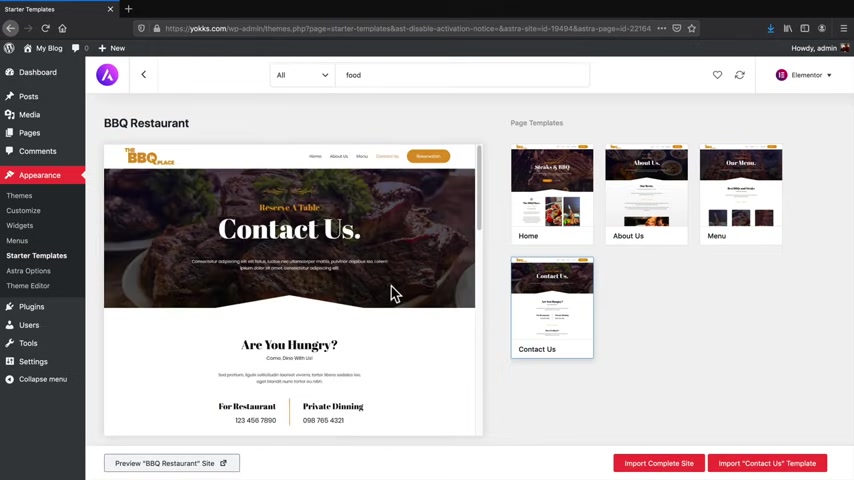
So , uh but under this uh barbecue restaurant , I will click on this and it's showing us the website .
So this is the home page , the About Us page .
You can take a look at it as well .
You can scroll through each page and decide what's for you .
So this is the menu and this is the contact us .
So pretty cool .
Now , on the bottom right here where it says import complete websites , I'm gonna click on this and it's going to say , all right , are you sure you want to import everything ?
In fact , you can even delete the previous website .
So if you're working on a website before it'll delete everything and just uh put this website on your website and then you know , that'll be the end of it .
But um right here , I will click on import .
So now it's importing all the necessary plugins content and images to your new website .
That'll make it look amazing .
All right .
So the website has successfully been imported and I'll click on view sites and we have a beautiful amazing premade website that is all ready to go .
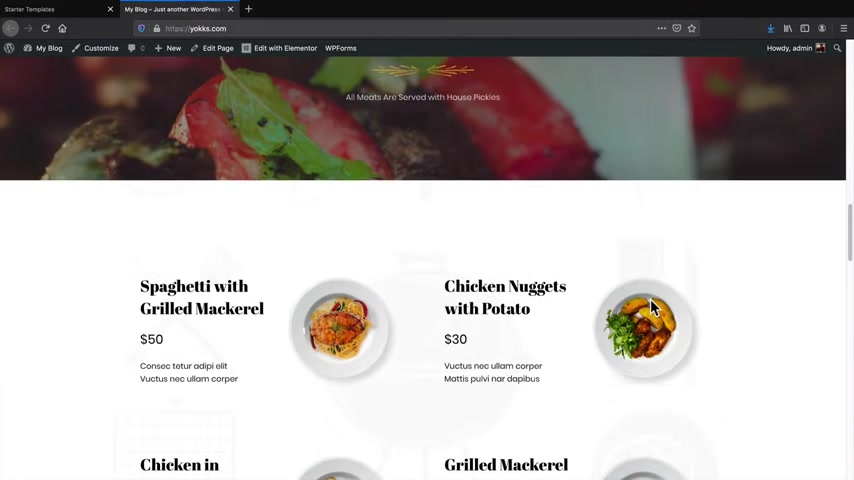
Now , this website is a live website .
So this is a real website .
So if someone comes through the website right now , they're going to see this same exact website .
So it created the home page for us .
It also created the about us page .
It created our little menu and it created the Contact Us page .
So that is pretty amazing .
Now , you might be asking yourself , Darryl .
Ok .
I have this website but I am not steaks and barbecue .
So how do I edit everything ?
Well , I am glad you asked .
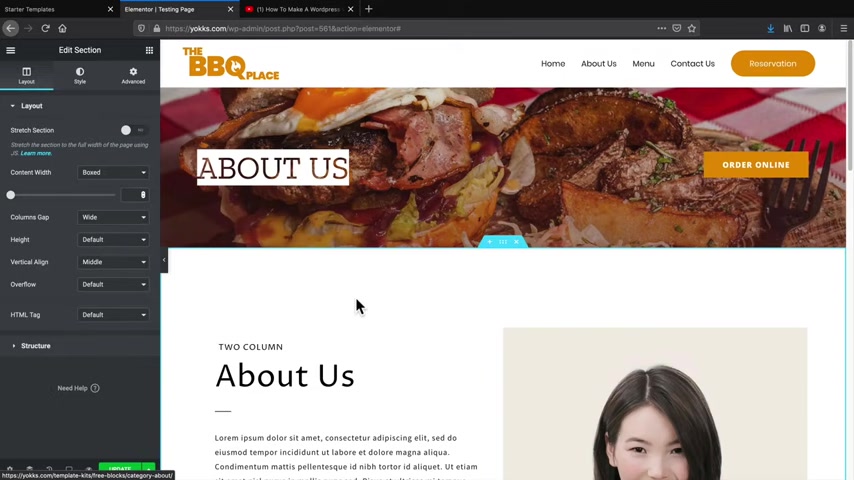
So , uh right here under the edit with Element to this is the page builder that you're going to use to basically make changes and edit your websites .
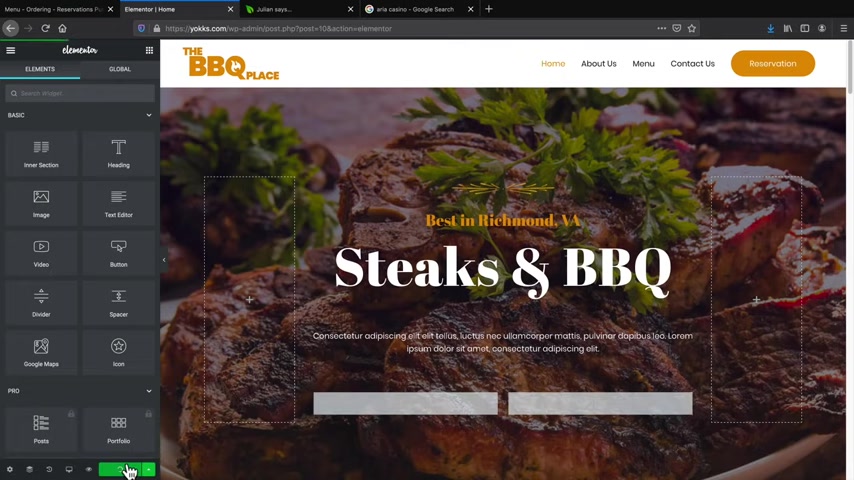
So I will click on edit with element to All right .
Awesome .
So here we have the page builder .
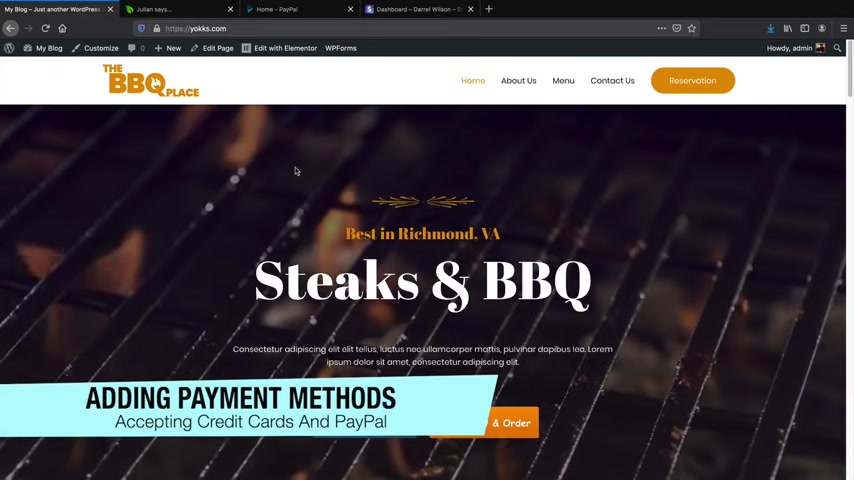
Now , this page builder is pretty simple .
So instead of steaks and barbecue , we can do uh , pork , you know , pork and beans , you know , or you know , pork and beans , whatever and you can go ahead and just change whatever you want visually on the website .
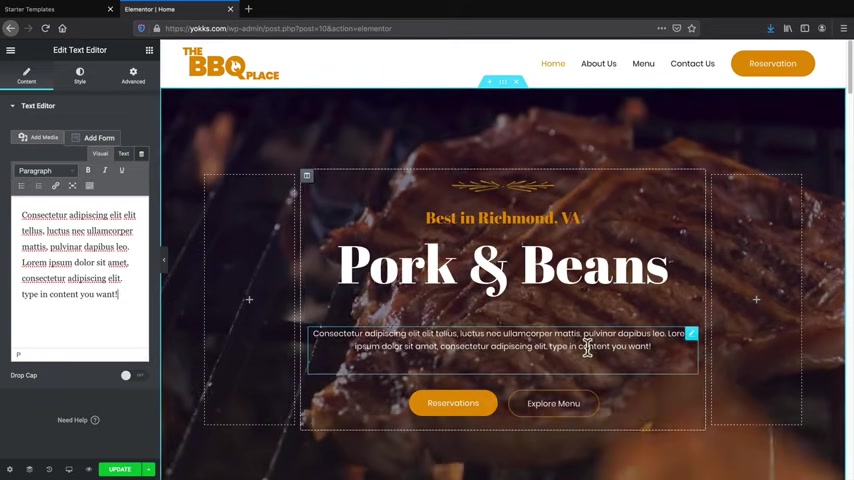
So right here , you can go ahead and type in any contents content you want and you'll see right here how it's displaying the reason why it was going up like that is because this has an animation on it .
And , um , you can go ahead and just put , you know , you can make any changes you want to pretty much everything .
So , uh , for example , right here , I'll scroll down and I set up the , the best , the barbecue place .
I'll put the steak place .
Now , right here , we have this button .
And if I want to change the button , you'll see , we have these three columns , we have content style and advanced .
So you'll click on style .
Now , style is basically when you want to change the style of it .
So the color topography and the font size , so the topography , we can change it to something like uh Verdana or Helvetica or something like that .
You can see how the fonts changing .
Also , I can change the size of its to make it super big or I can go ahead and you know , decorate it here .
You can kind of get the points .
Now for the text color , I can leave it as whites .
But for the background color , I can change this to pretty much any color that I want .
So that is pretty cool .
I'll leave it as black for now .
We'll just change it as black and then scrolling down here .
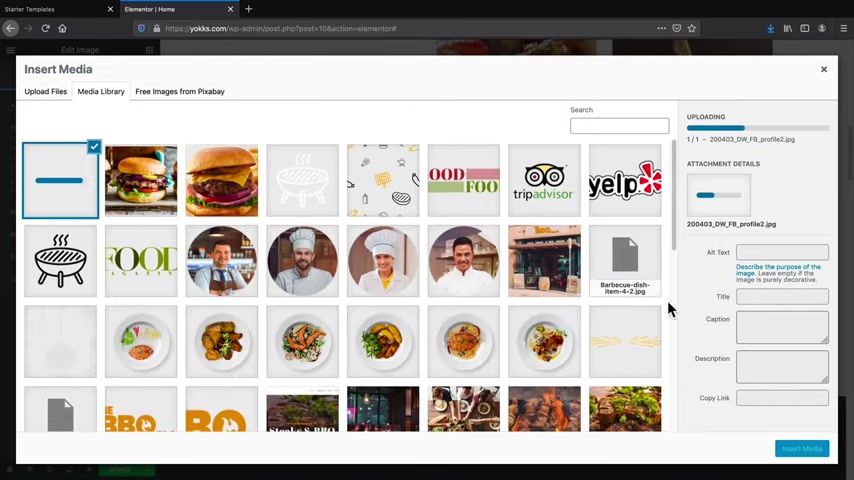
We can go ahead and say , all right , you know , I have these images , but maybe you want to put your image instead .
So whenever you want to swap an image , you'll just click on the image , you'll click on , choose image , select files and then I will select the image .
So I have an image of me .
I'll open this and uh I'll go ahead and insert that and now we have a picture of me .
So that's pretty cool .
And then you can kind of go through here and just change anything that you want .
So right here style , I'll change this to something like white and um these little empty boxes right here , we can just add an image .
So if I want to add an image right there of something like uh you know , a plate of food .
And then over here , I can take this image and just drag and drop it .
So what I'm trying to get out here is that this is a fully visual drag and drop builder that's just super easy to use .
So you can kind of go through these and make any changes that you want to your websites .
So let me go ahead and click on updates .
All right .
So I've basically shown you how you can kind of edit stuff and how you can design pretty much anything that you want .
However , let's say , for example , you want to add a new section .
So you're saying , you know , Darrell , I want to add something in between this section right here .
You know , I want to add a little bit more or maybe you want to delete this whole section so I can click on this X right here and delete it and right here into this plus icon , you'll see that we have these three options .
So this is to add a new section , we can add a full template or we can add a block , which is also a starter template .
So let me just go ahead and go to the basics here .

I'll click on the plus icon and say maybe I just want to have a two column row .
All right .
So now we have two columns right now , I'll click on these squares which gives us these little um elements .
I'll take this heading text , I'll drag it right there , click back on the squares , click on the divider and then I will go ahead and grab in some texts and there .
And lastly , I will put in a button right here .
There we go .
And then on this side , I can probably put in an image .
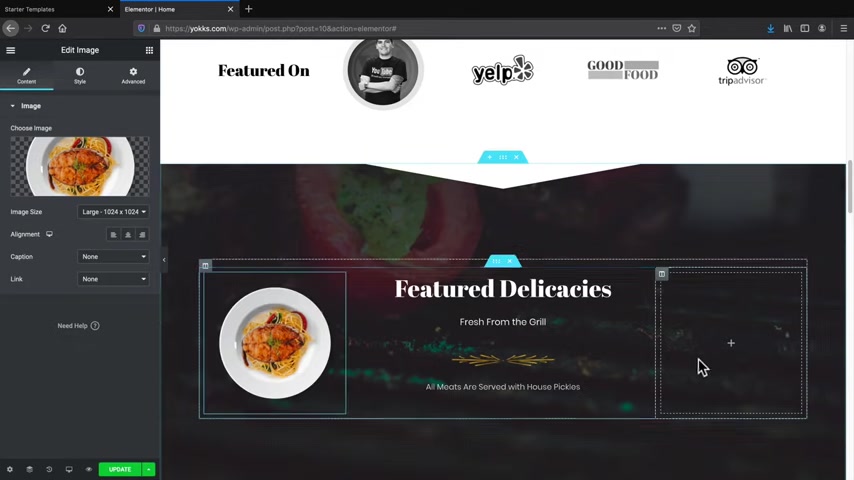
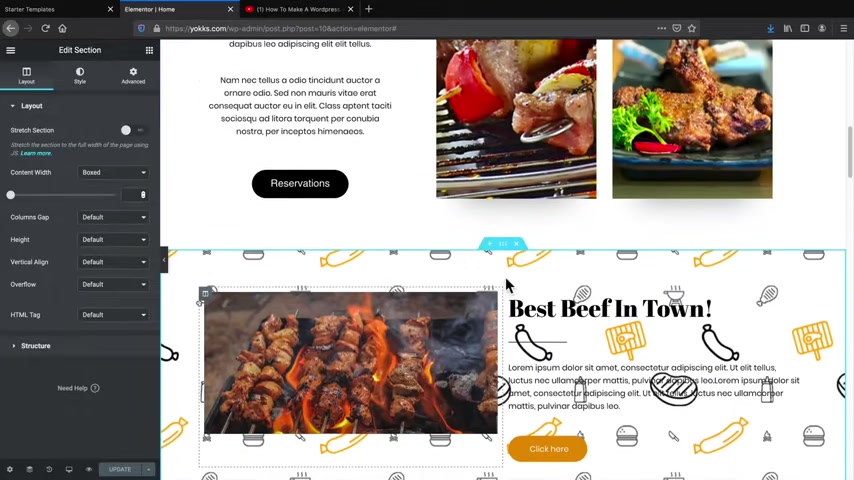
So describe an image and then uh you know , we can go ahead and choose an image and then maybe I can add in uh I don't know we can add in this delicious uh this delicious beef right here .
So I'll put something here like uh the best beef in town .
Best beef in town .
Is that beef ?
I think that's beef and that's chicken , right ?
Or is that ?
Yeah , that's , that's beef .
Yeah , let me know .
Let me know in the comments .
I think that's a mix of both .
That's definitely chicken on the left side and this is definitely beef .
And then right here we have this divider .
Now , I just want to use this for like Decor purposes .
So you see here how I just kind of have this like as a separator , you know , from the text and then here I'll copy this and just paste more text in like that .
And then there you go .
We have a new section and let's say I want to add in more space .
So it's a little scrunch together .
So if I click on these little dots right here under the advanced tab , I can actually add space .
So here we have padding , I'll uncheck this and just there we go click until your heart's content .
So we add around maybe 70 pixels to the top and 70 pixels to the bottom .
Look at that .
That is amazing , right ?
All right .
And let's say for example , you want to add something in the background , maybe you don't want that white , ugly background .

So again , just click on the dots and style and we have background so we can have a gradient background , we can have a video background like you saw on the title or we can just have a classic color background , you know , something like that or I can go ahead and even add in an image to the background .
So uh it really depends on what you want to do .
So for example , if you don't want to add the color , I will clear that and I can add an image to the background and maybe just add in these little cute little things or whatever that is .
So that's just a way on how you can kind of build your websites .
So that's just a quick little crash course guys on this page builder .
Now , this page builder is incredible and I already have two other tutorials that are about two hours long that go in depth for everything that you possibly need to know about this page builder .
So this right here is an additional video on element to and elements or pro .
So I basically cover all the features and all of the information including the advanced features like the theme builder in that video .
So if you want to further your knowledge about this page builder and wordpress , I highly recommend to watch that video .
But for this video , I'm not gonna go through every option in the builder because I have , I've already created a second tutorial for that and it is very in depth .
So let's keep going .
So I want to go ahead and just undo that change that I did .
I don't want this section .
So I want to delete it and that's pretty much it .
And I will click on updates .
Now , the next thing I'm gonna show you how to do is I'm gonna show you how to quickly create a page and add it to the menu along with introducing you to an amazing plug-in that will give you tons of free templates .
So right here , I'll click on , exit the dashboard and I'll click on this w icon on the top left which is home and under here under plugins , I'll click on , add new over here under search plugins .
We'll type in in Vato en va to and this right here is a plug in that you'll need .
It's called in elements .
So you'll install it and then you'll click on , activate .
All right .
Cool .
So now that we've created that , what we're gonna do next is we're gonna create a page and I'm gonna show you how to basically create a page from scratch in case you don't want to use a template .
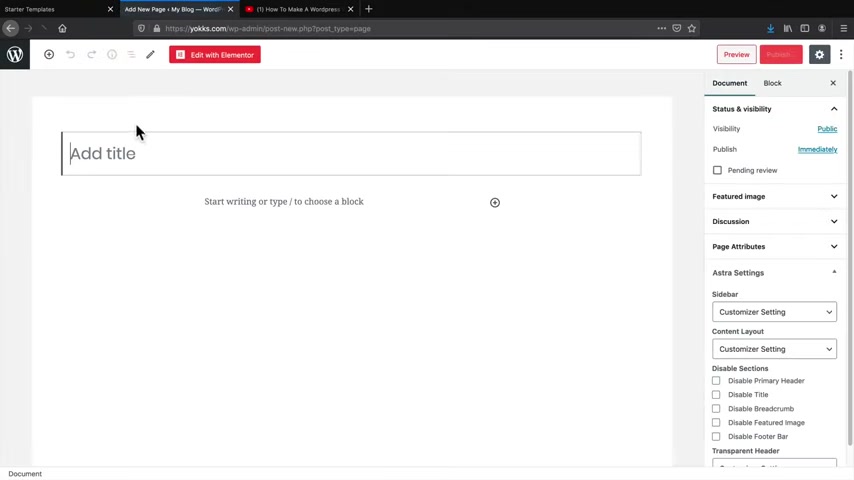
So let's add a new page .
So right here under pages , we'll click on add new and this will be our testing page or just a demo page , you know , just to help you get knowledge about wordpress and how to make pages by yourself without having to use a template .
Now , right here , we have these side , these uh astro settings .
So under the sidebar , I don't want a sidebar and under the content layouts , I want it stretched and I want to disable the title .
So what that means is on the page .
I don't want the title to be displayed and I want it to go full width .
So let me go ahead and just publish this to give you an example of what I'm talking about .
So I will click on view the page and you can see here how it's full width .
Now , this is a default photo that's created for us automatically .
So on every page it will be applied .
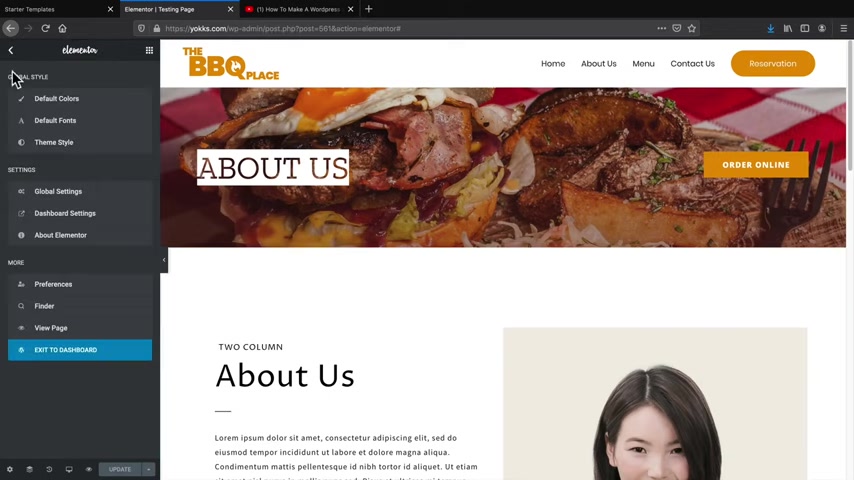
So let's go back to edit page and on the top right here , it says edit with element to go ahead and click on edit with mentor .
So this looks familiar right .
So now we're just basically building our website from scratch or we're building our page from scratch .
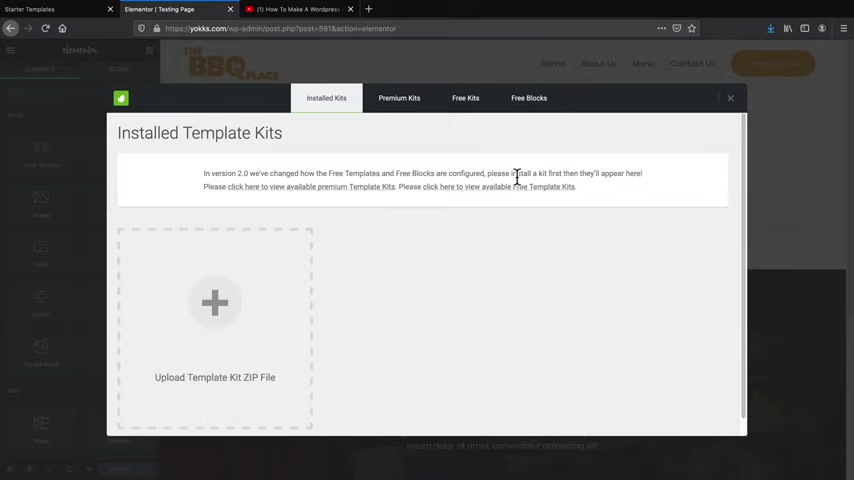
Now , you'll notice right here we have this green new icon .
Now , this green new icon gives us a library of templates and also free blocks that we can use for our website .
So first let's check out the kits .
So free kits and I will type in food and click on search .
And now we have a little bit more templates that we can use .
In fact , there's around 18 more templates .
So it covers organic food , Mexican food burgers .
We have recipes , a winery , a juice bar , a restaurant and cafe , a coffee shop , you name it , it has it .
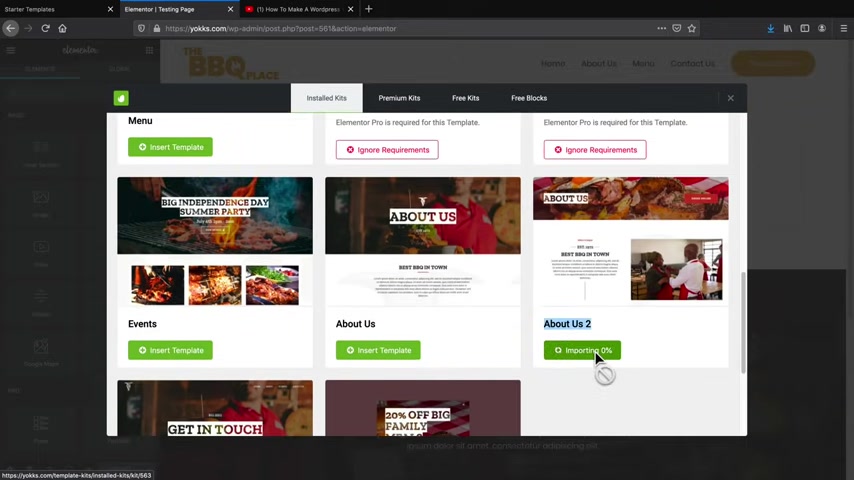
So what I'll do is I'll go ahead and go to page two and I'll just go ahead and um , you know , we'll just import one really quick .
So we'll do this .
Uh big barbecue one .
Yeah , big barbecue one and I'll click on install the kits .
All right .
Now , I will click on view the kits .
So here are a lot of pages that it comes with .
So where it says pro that means it requires element or pro .
Now we're using just the free version so we can use the other pages except for those Pro pages and there's still quite a bit of pages that we can use .
So it's not like we're losing out here , but I'll just say , you know what I want to insert this one right here .
The about us two , I'll in the template and now it's importing that page onto our page that we are creating .
All right .
Awesome .
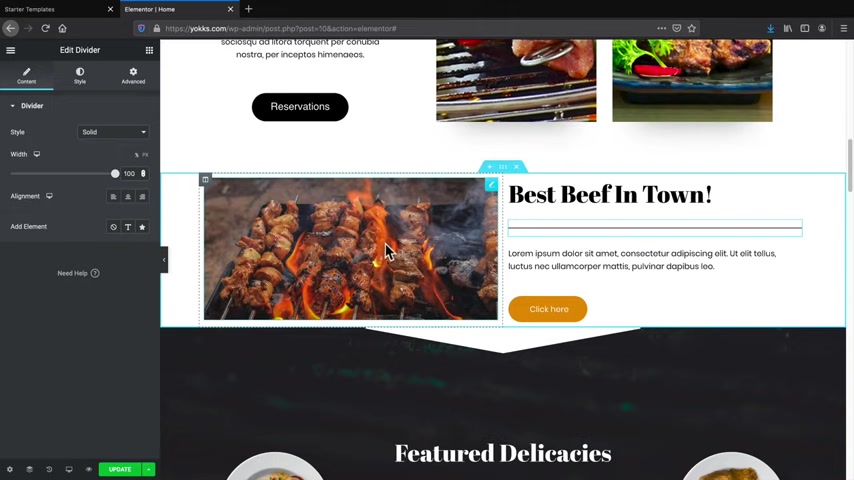
So this is now our new page that we were working on and you can go ahead and make any changes you want to the website .
So the best food in town , you can change these images , you can move stuff around .
So for example , if you want to take this and put it down here , you can take these dots , click on it and hold it and then drag it down there like that .
So it's totally drag and drop .
I mean right here also as well , I can take this and drag it over there and then if you want to add something else , we can add more to this page .
So here are the end auto elements .
I will click on this again , but this time I'll click on free blocks .
So we also have blocks and what blocks are basically are just sections that we can use instead of the whole premade website .
So for example , under the about a section , you'll see that there are quite a bit of blocks right here .
And the one that I like to use was something like this one right here .
So we have this about us section .
So I'll insert this template and it's not really a template , it's more of a section .
So for the about us section .
I'll just say , you know what uh I'll delete this and now we have like an Asian restaurant .
So all you need to do is just change this to like some sort of like , you know , Asian style restaurant or like sushi or something .
And then you have a Asian restaurant and then here you can talk about how the Asian restaurant got started .
So it's just a matter of just changing a few images , text and you can basically , you know , create anything that you want from scratch and you can keep using these blocks .
And the great part is these blocks are all completely free .
So that is incredible .
So call to action , uh you get it , you can kind of go through these and just take a look and then just insert these at your own disposal .
So I hope this is really helpful .
I mean , I , I want you guys to succeed .
I really want you guys to have all the resources possible .
So I think introducing you to this plug-in where you can just go ahead and just insert pretty much anything that you want .
Um would make things a lot easier for you when you're building a website , especially as a beginner .
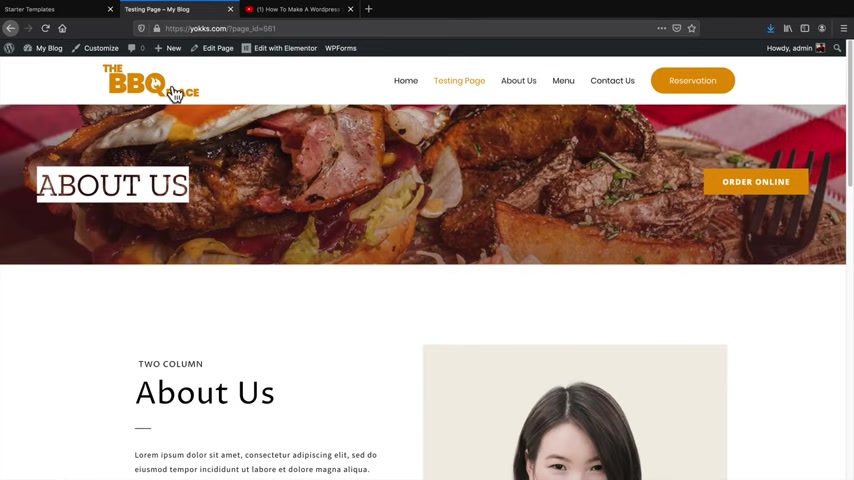
So let's say , for example , I'll just go ahead and update this .
We made this new page .
Now , how do we add it to the menu ?
So if you look at the menu right here , the page that we made is not there , we need to assign it to the menu .
So over here on these little dots , I will go to the exit to dashboard .
It's kind of annoying .
It used to bring us back to our dashboard .
But here let's go back here .
Now , under appearance , we have menus .
So here we have the pages and we have view all .
So I'll click on view all .
Take the testing page that we were working on and click on , add to the menu .
So now I can take this and pretty much put it anywhere I want .
So testing page save menu and now we can take a look at our websites and then the testing page is there and there you go .
So it's basically everything that we created and you can just go ahead and mess around with that and have fun and you can make your own pages and you can assign them to the menu .
You don't have to use the default , um You know the default template that we're using .
So now I've shown you all how to basically do all that .
Let's talk about how to change this menu and then we'll talk more about the money aspect and how you can add an online ordering system .
So you'll notice this customized button up here , go ahead and click on customize .
So the customizer in a nutshell is what the theme controls .
So this right here is the page builder .
The theme is more of the header and also the footer .
So you'll notice right here we have these little blue pencils .
If I click on that , you can see the logo and the retina logo .
So all you need to do is just click on , remove , select the logo and then just add the logo in for whatever you know , whatever you're trying to add .
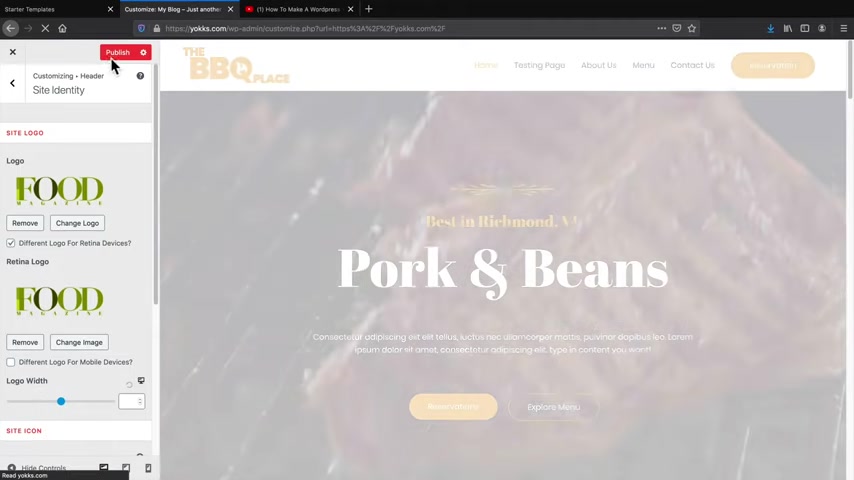
So I'll just put in this uh you know , this random logo here And also for this one , I will change this one and publish .
There you go .
Now we have a new logo .
So that's how you would basically add a new logo to your website .
Now , I want to add one more thing in this video before we go on to the next section is a lot of beginners tend to mess up their website and they have a lot of problems and they start to panic .
Don't worry if your site is pa ruined or whatever it's OK guys .
So I'm gonna show you a plug in that you can use that will reset everything and you can go back to where you were working on before .
So under plugins , I'll click on add new .
Now , think about plugins like applications .
So for example , this is a contact form .
This helps with ranking , this helps you sell online .
This is the page below that we're using .
This is the SSL , this is another contact form .
This is for security .
Uh The list goes on guys .
There's only like 50,000 plugins in the word press uh repository .
So there are quite a bit , but under search plugins just type in reset .
Ok .
And this is the plug in that you're going to install .
It's called WP resets and then you'll install it and then you'll click on activate .
Now , I've already activated this plug in .
So yeah , just letting you know , I , I did that when I was editing the video .
So if you want to use this plug in , what you'll do over here is going over to tools and go down to WP resets , you'll scroll down to the bottom and simply type in resets , reset websites .
Now , once you do this , it will delete your website , it will keep your plugins and your themes uh activated still or installed but not activated and it'll delete all of the content off your website .
So I just want to make that very clear if you want to restart your website .
So I will click on restart wordpress and A so it is back to factory settings and we can start completely over again .
So under my blog , visit the site .
Awesome .
It's back to exactly where we were when we first got started .
So it's just a way on how you can kind of restart if you're having problems or if something gets really glitchy or something like that .
So I'll go ahead and just install everything all over again .
So here Astra , I'll activate it .
I will get started with the starter templates .
See how easy this is .
I mean , see how fast technology is today .
Look at that , click on mentor , same thing .
Then here , food steaks and barbecue , import complete websites and import website .
And after this is done importing , we are right back to square one .
So you can always go back to the progress that you're working on before or if you want to switch templates or if you wanna switch themes , you can have all you can knock yourself out .
Go crazy .
All right .
Awesome .
So let's click on view the website just to make sure this is working and there you go .
So now we can start over from scratch .
So if you made a lot of mistakes before you can go ahead and start over from where you're working off and yeah , I hope that helped .
So now I've shown you all basically how to make the website , how to add pages , change the logo .
Now again , if you want further knowledge of this page , Boer , I highly recommend to watch my other video where we talk about all Element or pro and Element and we go into every single option to make sure that you know what you're doing , you know , just I just want you guys to , to like the video , make sure you know what you're doing , you know .
So now that I've shown you all this , let's go ahead and move on to the next section where we are going to implement an online ordering system onto this website .
Let's go .
Ok .
So first we're going over to my blog and we'll go to dashboard .
Now , what we're gonna need to do here is we're going to install a free plug in .
That's gonna connect our website to a website called Gloria Food .
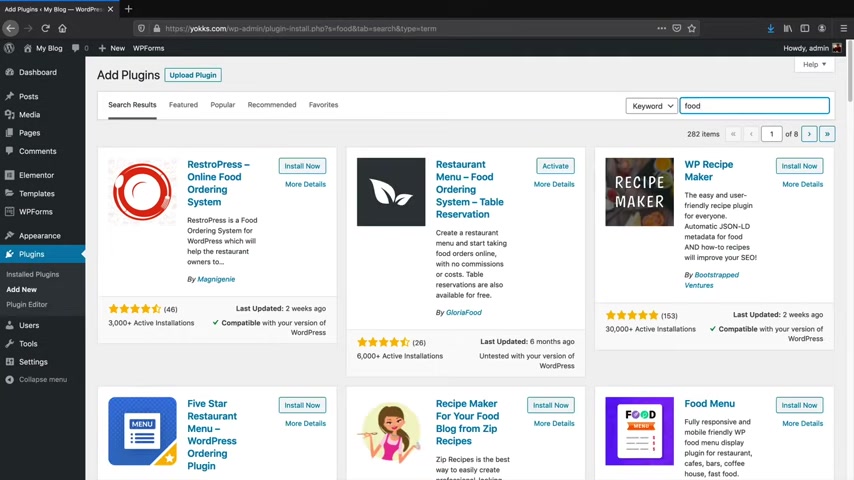
So over here under plugins , I will go to add new and under plugins .
Just type in food .
I know food .
It's the easiest way to actually get there .
And this is the plug in that you're going to need .
It's called the restaurant Menu Food Ordering System table reservation .
Now , there is also a link in the description of this video to that same website in order to download the plug-in .
But uh I'll click on install and then I'll click on activate because I've already installed this plug-in before .
So once I activated it , you'll notice on the top left side up here how it says menu ordering reservations .
We have the dashboard publishing extras and partner program .
The only ones that you're gonna use is the dashboard and publishing .
So let's click on dashboard .
So what we'll first need to do is we are going to make an account with Gloria Foods .
So , go ahead and make an account right here .
So fill this information out .
All right .
And once you have submitted your information , you'll click on sign up .
All right , cool .
So we're gonna set up your online ordering system in three simple steps .
We are first going to set up your restaurant information , we're going to create the menu and then we are going to publish it on your website .
So first let's click on get started under the set up your restaurant profile .
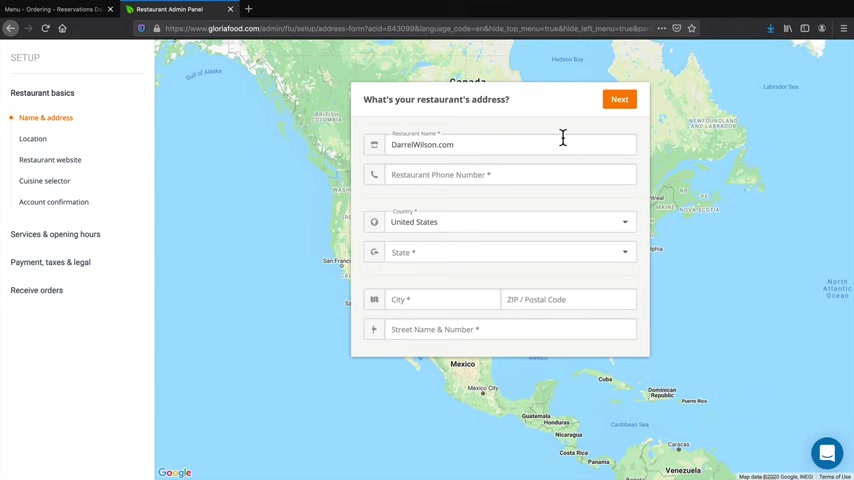
So where is your restaurants ?
Go ahead and fill this information out .
All right , cool .
So I put in my restaurant's address now , of course , this is just for the purposes .
I just put in art at casino because that was the only thing I could think of .
But once you put in your address , you'll go click on next .
So next we can go ahead and let customers know exactly where we are .
So for example , let's say we are right there .
That looks good here .
I will click on the next .
Do you have a real domain name ?
Yes , we do .
So this is the domain name that we actually got from site ground .
So you just go ahead and copy this and we will paste it in right there and click on next .
So what kind of food do you offer ?

Well , for this video , I'm just going to select burger .
Now , there are other options but you can have , you know , fun on your own time and look through those .
But uh I'll click on next .
Next , we'll need to validate your email .
So for the email that you registered with , you will need to go to that email and click on the link and verify your information .
All right .
Awesome .
So we validated our email address .
Next , I will click there and pick up options .
Do you offer pickup from your location ?
Of course .
Next .
Do you offer food delivery ?
Yes , why not ?
Next ?
We're gonna talk about the delivery zones .
So where do you deliver to ?
Well , let's go ahead and add a zone .
So add a zone and here we have zone one .
So basically , we have this little radius right here .
So 1.75 miles .
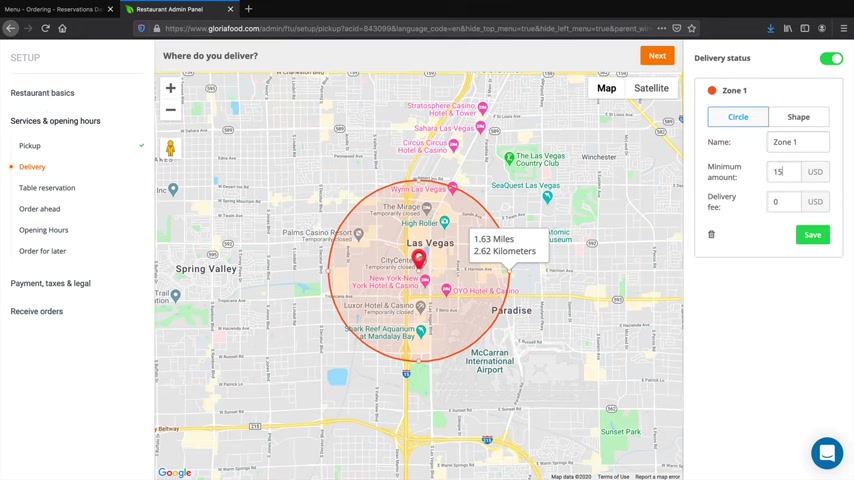
So what I'm gonna do is say , look , uh , we'll go ahead and deliver between 1.5 miles and you'll need a $15 minimum and there is no fee for that .
So I'm not charging you anybody a delivery fee .
So I'll click on save .
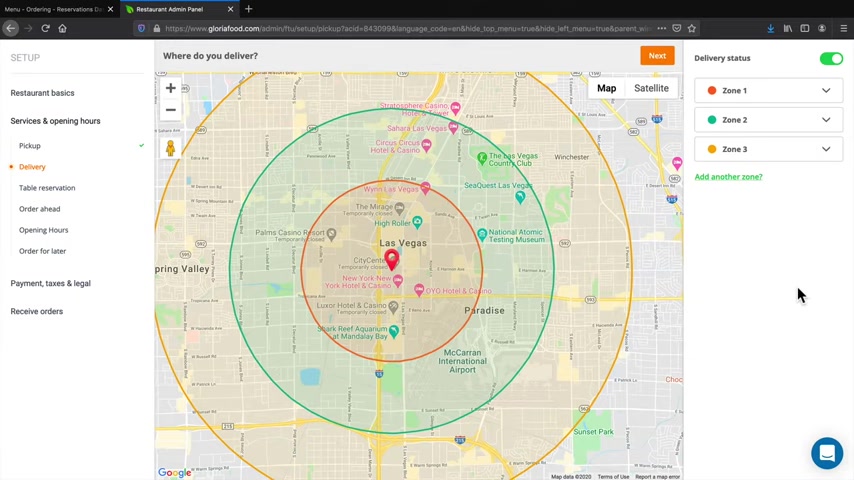
But let's say , for example , somebody is a little bit farther .
So we don't know where they are , but let's just say they're farther .
So I'll add a second zone and I'll say , you know , what if these guys are ordering ?
Maybe , you know , uh , let's just do three miles .
If they're ordering around three miles away from us , then they need to order more and we will charge a delivering fee .
So for example , it'll be a $25 minimum and a $5 delivery fee and so on and so forth .
So we can add in one more that goes around .
Uh , you know , four miles and that's gonna be a $50 minimum with a $5 fee .
Now , this is a good idea because this will protect yourself .
I myself used to deliver pizzas at ami's Pizzas in Chatsworth .
So , uh , I know that it can be a hassle for businesses that have far delivery .
So this is actually a really , really cool feature because I used to deliver pizzas back in the day and I hated going to like these mountainous areas .
It was such a pain in the ass .
But anyways , once you're done with that , uh we will click on next .
Do you want to accept table reservations ?
Yes .
Why not ?
Settings for table reservations ?
Now , by default , they've actually done this pretty well .
So there is a minimum of two people up to eight .
This reservation is kept four 20 minutes after the time .
So let's say , for example , they're late , then I'll say , look , we'll give you 20 minutes to get your butts over there .
And if you're not there , then we're gonna go ahead and cancel the table .
The reservation has to be placed at least 30 minutes in advance and this reservation cannot be put , cannot come more than eight days in advanced .
Sounds fair .
Sounds fair enough .
Yep .
All right .
Let's click on next .
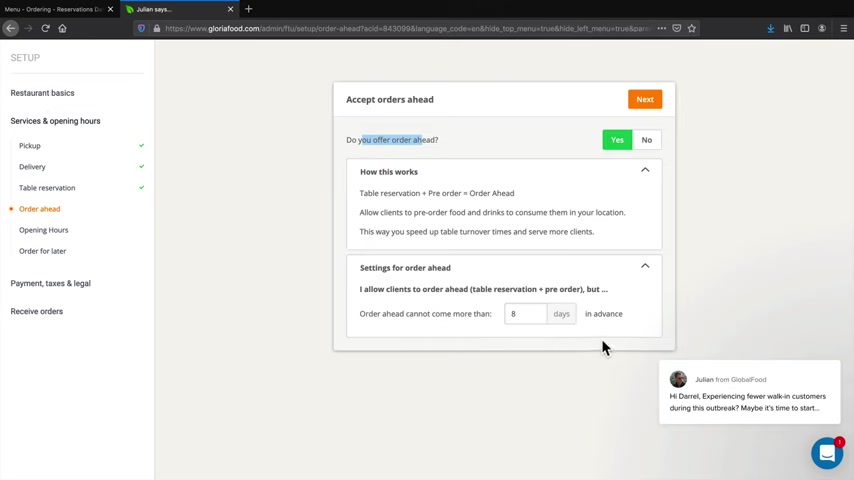
Do you offer order ahead ?
Yes .
So how this works ?
You can go ahead and read through that , but I'll just explain it .
So , settings for order ahead .
So what I'll do here is I'll just say I'll allow clients to order ahead , but they cannot order more than eight days in advance .
So that sounds about fair .
I'll just put something in like five and you can always go ahead and edit this and change it .
But I doubt you'll have , I doubt you'll run into a lot of problems with , you know , with clients ordering ahead and , and if not , they can just call you guys .
It's , you don't have to use the app step by step , you know , so I'll click on next , when are you open ?
So by default , it gives us this 10 a.m. to eight PM .
So we'll go ahead and say , well , you know , we open up at nine o'clock and we close at around uh nine o'clock .
Now , if you want to accept orders 24 hours , you can go ahead and put 12 a.m. 12 a.m. And then also you can select 12 a.m. if you decide to allow orders 24 hours because some people have restaurants that are open 24 hours like donut shops , right ?
Those places ?
Damn , they never close .
It's ridiculous .
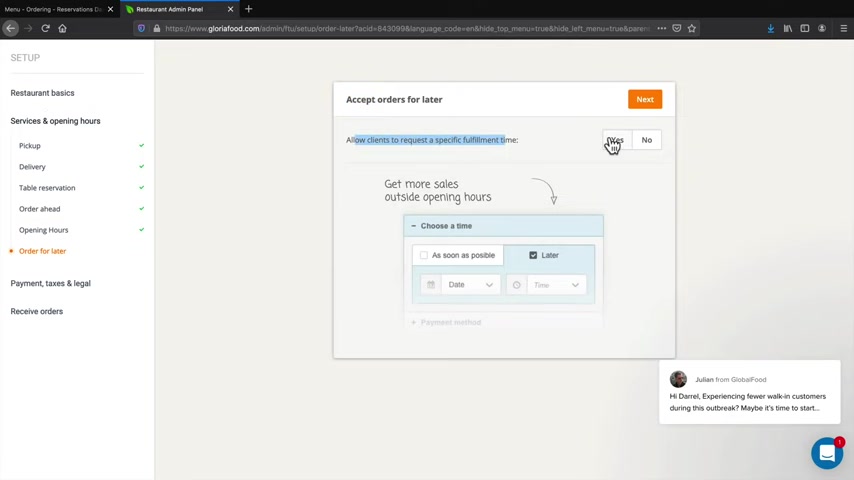
So here I will click on it next , accept orders for later .
So this is basically allowing clients to request a specific fulfillment time .
Do you want to allow them to order for later ?
Sure , why not ?
This is actually a good idea because sometimes corporations , they have big lunch uh like uh you know , Shindigs and you can , or they can go ahead and order like a big batch of lunch , uh you know , before .
So here we go .
So the order placement has to be at least 60 minutes in advance and the order cannot come more than four days in advance .
Right ?
Sounds fair enough settings for delivery .
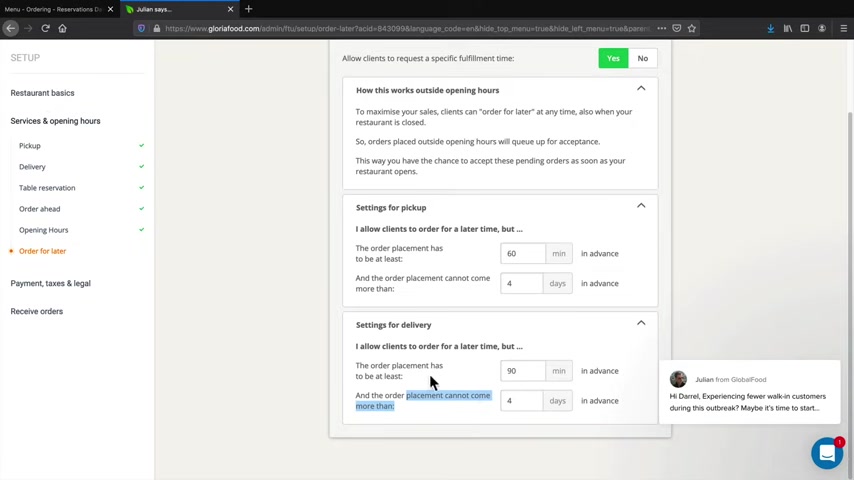
We have the I allow clients to order it for a later time , but the same thing .
So pretty much they can order no more than four days in advance .
So that's pretty much what , that's what that's saying .
And the order placement has to be at least 90 minutes in advance .
Right ?
So let's click on it next .
All right .
Taxation and currency .
Now , there is a website called tax jar dot com .
Let's say you are a complete beginner and you , let's see .
Tax jar , let's say , uh , state taxes .
There we go .
Let's say you are complete new with taxes and you don't even know how much your state charges for tax .
Well , just click on a state .
So I will click on Arizona .
Arizona has a 5.6% tax rate .
So if you go back over here , you can go ahead and adjust this to whatever you want .
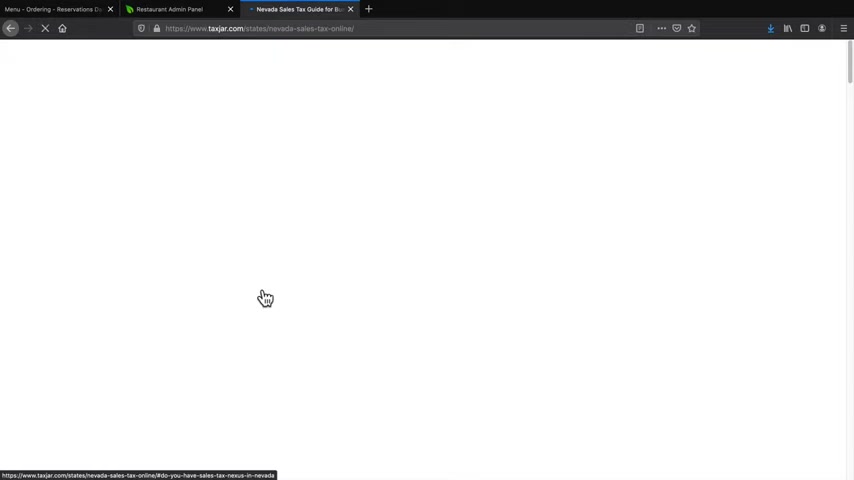
Now , this application is actually pretty good at detecting the sales tax because right here under the Nevada where I registered it says the sales tax is 6.85% and that is what it is , right .
Here .
So the application actually picked it up pretty well .
So , uh you know , have fun , have fun with that .
So here I'll click on next payment methods .
So we have quite a few , we have cash , we have card and we have call back and take credit cards via phone .
So I'll just go ahead and select all of these right now and then I will click on next .
So the official details and policy .
So go ahead and put in your restaurants , like the legal business name and just fill out as much information as you can here .
All right .
So you'll put in your information and then you'll click on next .
Ok ?
And you must agree to the terms of service , yada , yada yada and click on it next .
So next , we'll have to install the application .
So there is an application where you can actually get orders directly from your phone and you can also get it in your email inbox .
So I will click on next and say , all right , I have a smartphone .
Now , if you don't want to put in your phone number , you can always just say , you know what , I don't want to download the application , but I do want it to connect to my email instead .
All right .
So I put in my phone number and now it's telling me to go ahead and download the application .
Now , if you can't find the application or if you didn't get the text , I will put a link in the description to the application .
You just have to download it and then just put in your user name and your password and you are all good to go .
Ok .
So I have successfully connected my website to the application .
So now whenever I get an order , it'll go directly to my phone and it will also go to my email inbox , which is pretty cool .
So let's click on next and now we have an alert call .
So they're just saying if you have like an issue or something , they'll give you an automated phone call , etcetera .
So if you want to go that route , you can play notification and put in your phone number or a supervisor's number or whatever you want to do .
So here I will click on next and we are all done .
So that is pretty much it for this set up .
So I'll go ahead and go back to our websites .
So now that we put in our restaurant profile information , let's go to the next step and create the menu .
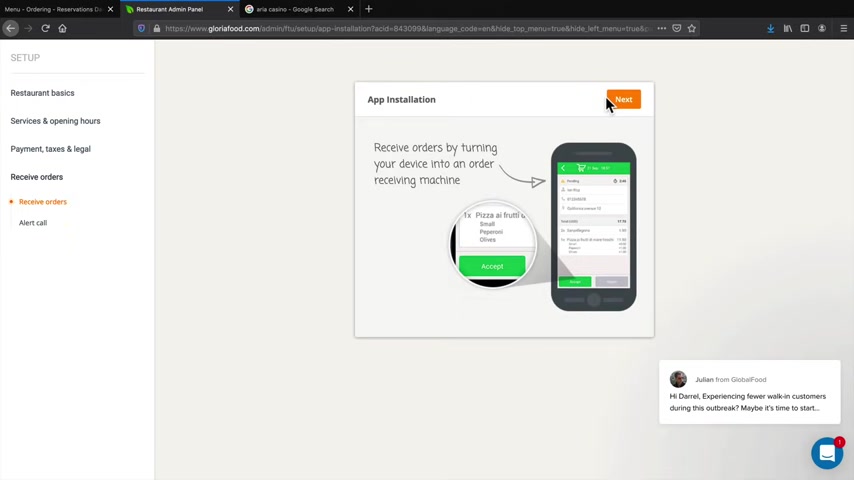
So I'll click on insert the menu .
So whenever you want to add something to your menu , whenever you want to do anything to add something to your website , you are going to do it from here .
So here I'll click on next , next , next , next , next .
All right .
So they give us a demo right here .
So for example , we have Pizza Margarita Pizza and all this stuff .
But what we're gonna do is we're gonna start from scratch .
You know , I want you guys to understand how to use everything .
So I don't want you guys using off their work because then you might not know what to do .
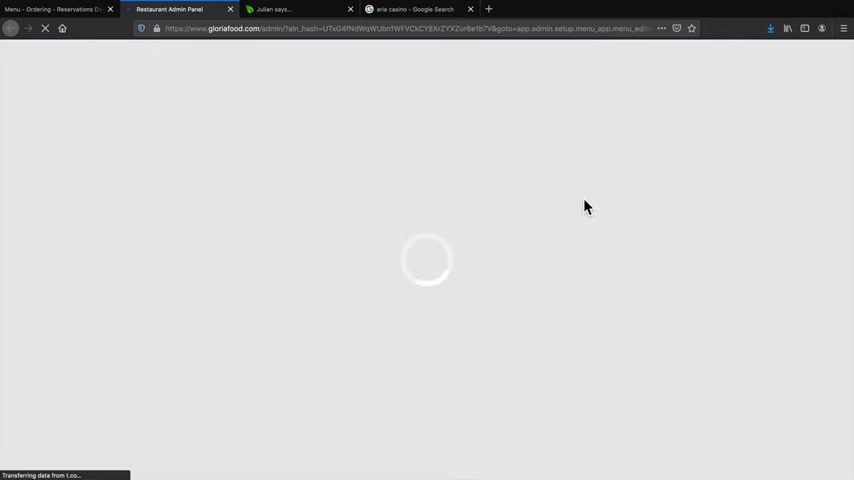
So let's go ahead and delete all of this right here .
I'm gonna delete everything here and we are gonna start from scratch .
Yes .
Yes .
I love working from scratch .
So uh on the left side right here , you'll see a category , click on add category .
So we have burgers and then under the category description , I'm gonna put the LaVoy Delicious , savory burgers and then I'll click on save by default , it'll create a picture for us .
Now , if you want to change this picture , you can just click on change and you can add in your own so you can upload your own or you can use this image .
But uh for now , I'll just leave that .
And uh for the name right here , I'm gonna select Hawaiian burger as you all can tell I was using this app for quite some time .
So it took me quite a bit to learn how to use it .
And for the Weinberger , I want to charge people 10 bucks .
Now , the Hawaiian burger is gonna be the most delicious burger ever .
So that's what the Hawaiian burger is delicious right now .
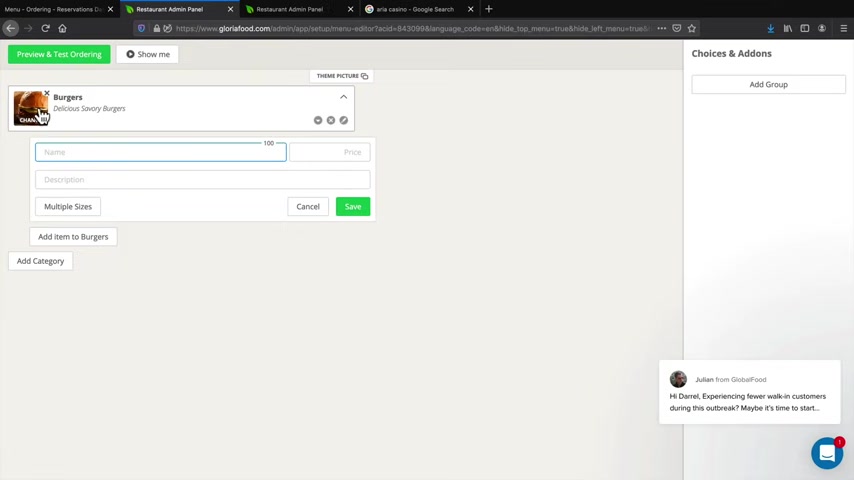
Let's say for instance , we have the Hawaiian burger .
You saw I saved it .
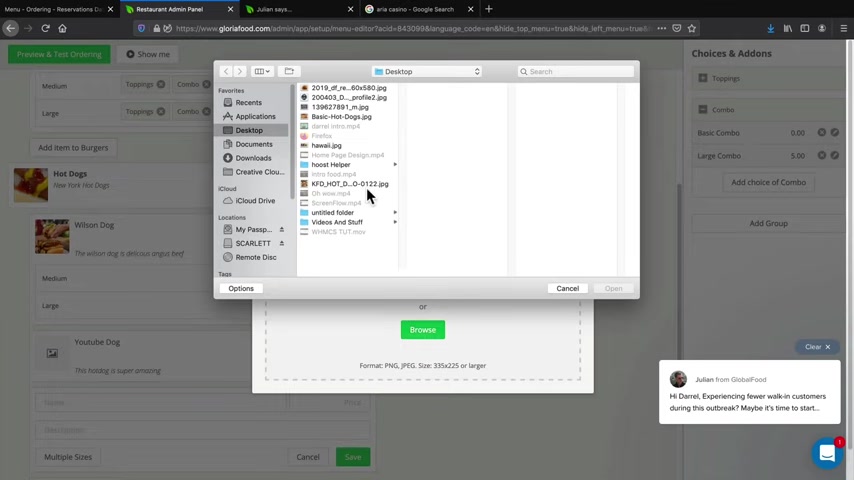
I want to add in an image for the Hawaiian burger .
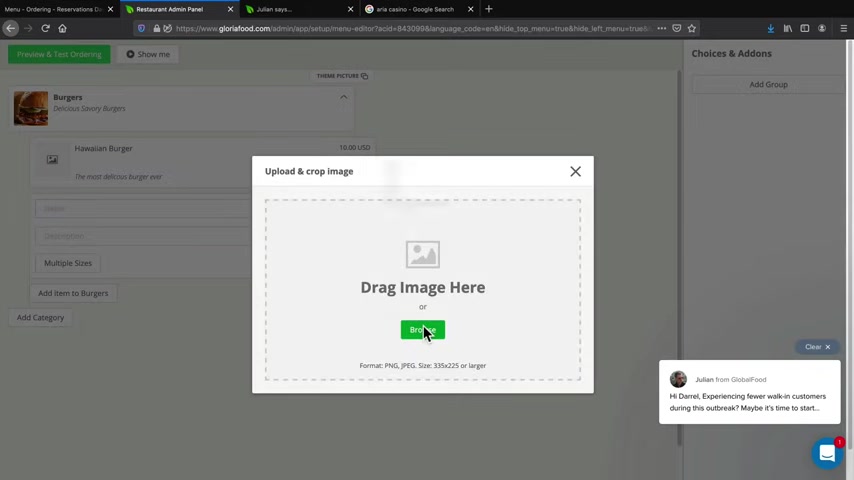
So here I'll click on image , I'll browse and under my um pictures here , I will go ahead and upload a picture of this burger .
Delicious , delicious .
Now , there's one more thing that you can do here .
So if you want to edit the Hawaiian burger , let's go back and click on this little pencil and we can have multiple sizes so we can have the normal size or we can have the big size .
Now , you can also do something like making it a combo .
So you can add a combo if you want , but we can also add the combos on the add-ons as well .
So it just depends on what you want to do here .
But let's just say we have medium and then we also have large , which is a $5 extra .
So that's pretty much standard .
So let's say for instance , you're a Thai restaurant and you want to offer a pad Thai , you can offer a pad Thai as the base version .
And then if they want extra pad Thai or the large pad Thai , you can just charge them a $5 fee .
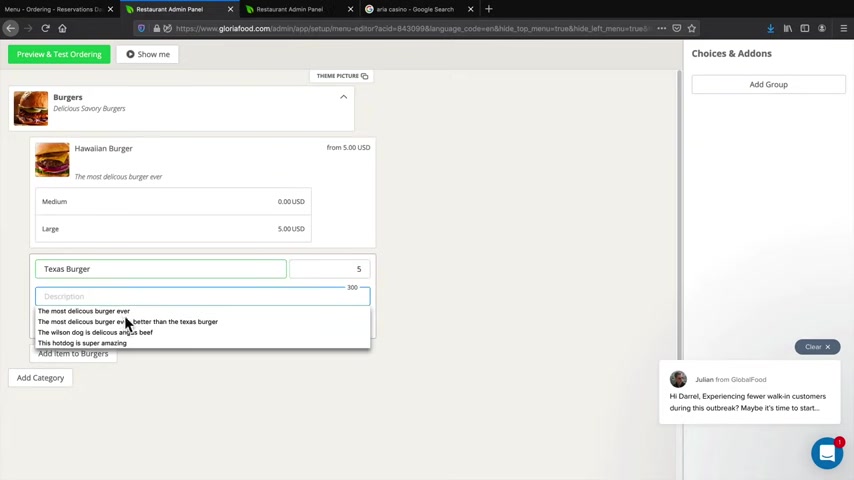
So now that we have the Hawaiian burger , let's add in the Texas burger and Texas burger .
It'll be five bucks and the same thing .
Let's see .
No , there we go .
I mean , this , this one was actually here , I'll edit this one .
This one was better than the Texas burger .
Ah , yes .
So the Texas burger is $5 .
And , um , yeah , I mean , that's pretty much it , multiple sizes .
I'll just do medium is zero .
And then for that I will do large .
Now , one thing that you might want to do here for the burgers is instead of adding the size , you can add the cooking type so you can put like medium , medium rare , uh , you know , well done uh you know , extra crispy , whatever they wanna do , you know .
So I'm just giving you ideas because you don't have to use it .
You can use it any which way you want as long as it achieves .
What you're trying to do is basically what I'm trying to say .
So under the Texas burger , let's add in an image there .
So uh we'll go ahead and put in the No , no , no , no , no , no , no , no , no .
Oh There we go .
Oh Yeah , there we go .
Well , I use this for Hawaii but whatever you guys get the point .
All right .
So now we have two burgers .
But what goes with these burgers , you know , uh can they add stuff to it ?
So let's do that .
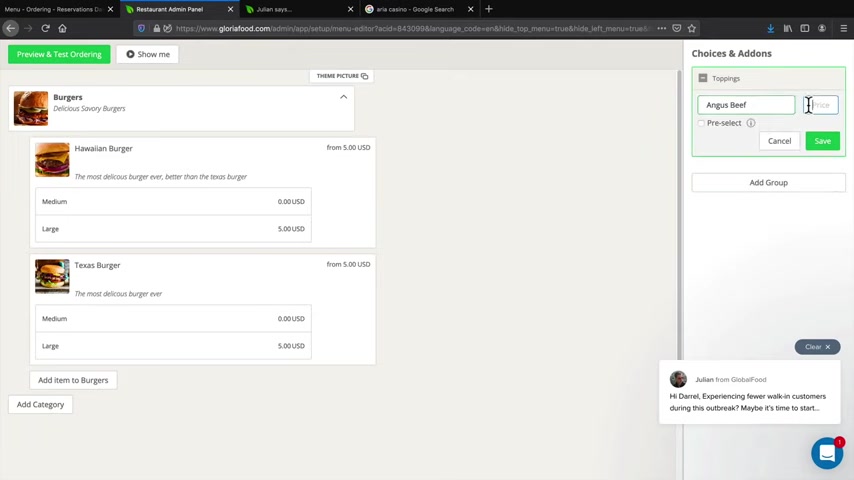
So , on the left side , I'm sorry , on the right side , under a group , we'll do something like toppings and uh I'll save this .
Now what goes on the toppings ?
Well , Angus beef , right ?
Another $1 OK .
Uh Let's add the cheese for a dollar .
Let's add the , no , we'll do , uh , let's see , what else have we got here ?
Uh , we'll do ranch for a dollar .
And , uh , what else goes on a cheeseburger ?
Uh , onions ?
I mean , are we really gonna charge onions ?
Are we really gonna charge onions for a dollar ?
All right , we're doing it .
Yeah .
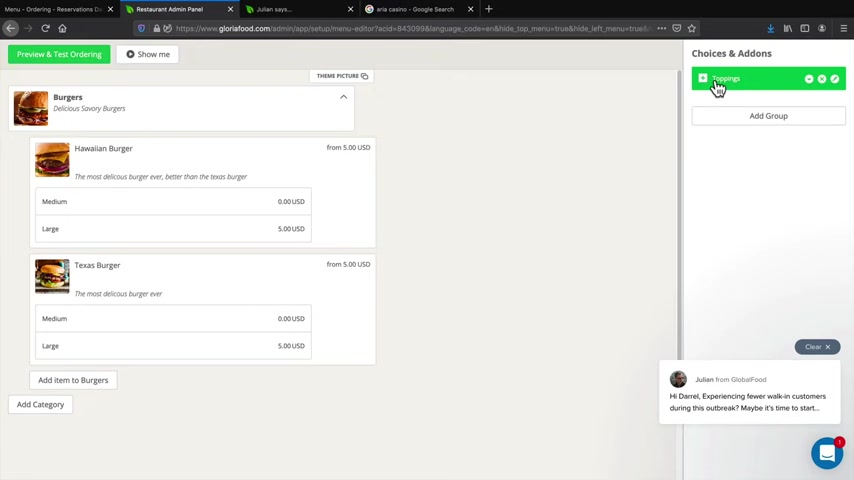
So , so we have our toppings now .
So let's say , for instance , ok , we have the toppings .
But how do we apply it to the certain food ?
Right .
Well , we just drag it guys .
That's it .
Just drag it , drag it , drag it and dragon now , I could have just done linked to all sizes as well .
But um you know , I'm just showing you guys how to do it , step by step and then let's say we wanna do combo .
So we have a combo now .
So we have just the basic combo which is a $0 price or we have the large combo which is $5 extra .
So we can also take the combo and we can add it to the cheeseburgers .
Pretty cool .
Huh ?
So let's go ahead and oops .
Oh , what was going on there ?
Oh , ok .
Ok .
OK .
It's getting weird .
It's getting weird sometimes it happens guys .
So now we have the burgers and we have different types of burgers .
So congratulations .
We just made um we just made a burger with various toppings and combo add-ons .
So let's just go ahead .
And do one more .
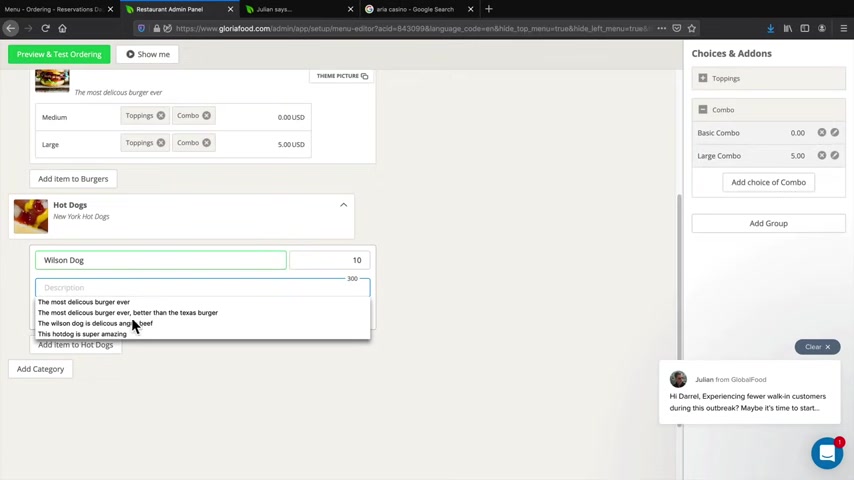
Now , you don't have to follow me here , but I'm just going to go ahead and make hot dogs .
So , under the name right here , I will put the Wilson dog .
This is gonna be $10 and , uh , the Wilson dog .
There we go .
And you know , multiple sizes .
Sure , why not ?
We'll do medium zero .
And then we add in the large size .
Right .
That's another $5 .
So they want a large hot dog , it's gonna cost them another $5 .
So we have the Wilson dog and I will add in an image for the Wilson dog .
Hope you guys are following me here .
I hope I didn't lose anybody yet .
I think this is pretty easy , right ?
I mean , that's just because I've been using wordpress for like what , like 56 years already .
So , all right .
And then we have the youtube dog .
So the hot dog is super amazing .
I'll save that and then give the youtube dog a picture .
Uh I believe this one here .
Ok .
Awesome .
And I'll cancel that .
So uh I'll go ahead and give this also a size .
So I'll just give them medium for zero , zero , right ?
Because that's , that's like standard , right ?
You know , so and then we'll just do a large hot dog .
The large hot dog is gonna be $5 extra .
Now , one thing I wanna do here is we have toppings , but we also have combos .
So I only want to take the combo this time because I don't want to use the toppings .
I mean , how am I gonna put ranch or ?
I don't know .
Do you guys put ranch on your hot dog ?
I don't , I don't know .
It's , it's a mystery .
I think I had an ex girlfriend who used to put like ketchup and ranch on her macaroni and cheese or something like that .
It was weird .
I was like , what are you doing ?
So anyways , we have our products and everything's pretty much set .
So that's it .
Guys , we are all done .
Now , at this point , I've given you enough knowledge and information to kind of keep going .
You can go ahead and add different toppings , different combos .
You can create another , you can add another one for , I don't know , a dessert .
Maybe you can put a , do you want to add AAA lava lava cake dessert or something like that ?
You know , you can do that as well .
So now that we've done this , let's go back to our websites .
So we've done step one and we have also done step two .
Next , let's go ahead and publish this on our website .
So next , let's click on publish and this is a short code .
So we have a short code for the menu and also we have a short code for the table reservation .
So let's do that .
Now , what I'm gonna do here is I'm gonna go ahead and open up the website under a new tab and I will edit with Element or so , I'll show you how you can add these to your website .
So , on these buttons right here , I want to delete these , I want to add the buttons that they give us .
So these are short codes .
So what we'll need to do is we'll need to take these short codes and put them on our websites .
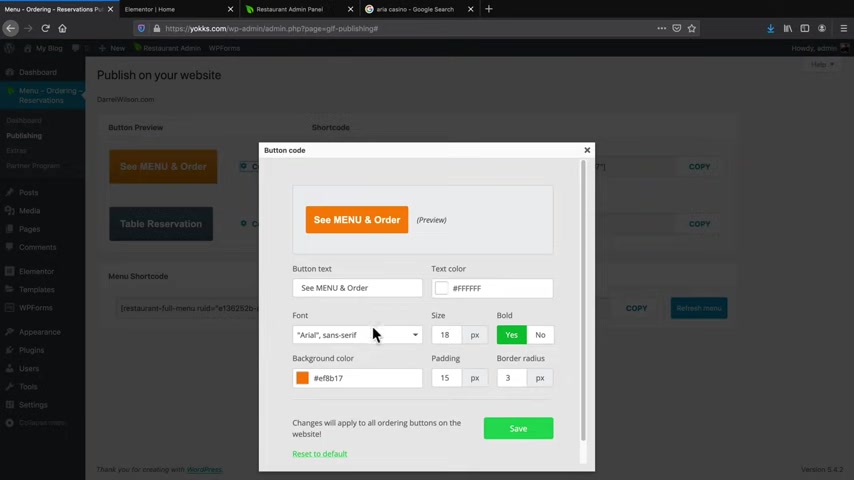
Now , one thing I want to note here is that if you click on customize , you can customize the color , you can customize the signs , you can customize the font , you can customize pretty much , not everything that you want to um add to your website to kind of make it match and to make it look like , you know , it's not coming from another program , but when it is , but uh people visiting your website won't know that .
So who cares ?
You know .
So , uh I'll go ahead and take this one again .
Copy its now under the widget right here .
Elementary actually has a short code widget .
So you see how I typed in short code , you'll take the short code first , we'll right click and delete this right click and delete this .
I'll take this short code and I'll drop it in that box .
Then I will paste the short code and click on apply .
I'll go back here and I'll take this one now and then I will do the same thing again .
So short code , put it in the box and then I will paste it and click on apply and I will click on update .
All right .
Awesome .
Now , let's go ahead now and test our website and see if this is actually working because right now we just see this text .
So let's go back over here and go to view page .
All right .
And there we go .
Our buttons are live .
Now , I do need to move this button .
Then I'll show you how to do that in just a bit .
But let's click on these buttons and see what happens .
So see menu and order .
All right .
Awesome .
We have the Hawaiian burger .
We have the Texas burger .
We have a picture of the burgers .
Awesome .
So we have the Wilson dog and the youtube dog .
So let's first click on the Hawaiian burger .
Oh Look at that .
We got medium and we got large .
We also have all of our toppings .
We have the combo where they can have the basic combo and the large combo .
Let's look at the Texas burger .
So let's go ahead and go through these .
So let's just say for instance , I clicked on the large .
So it went from 0 to 5 .
So it's being charged $5 .
We have these add-ons right here , right ?
You see it's $9 I will add in the large combo and then something like uh you know , even in the special instructions , maybe you can put the cooking type , but maybe you should have like the , you know , the cooking type here , like medium rare and stuff like that .
So uh I'll go ahead and click on add to the cart .
Next , we have these three options .
So you can see here how it's placed in the cart .
So on the top right here , we have these three icons .
So I'll click on this little eye icon and this is just displaying the hours .
It's showing where we deliver .
It's telling everybody the fees and they can also change their language at any time .
Uh If they need to do so , they can also see the phone number so they can give you a call .
But uh I'll go ahead and click on the checkout .
So we have the contact , we have the ordering method .
We have all the food right here .
So the ordering method , they can do pickup delivery , table , reservation and order ahead .
They can also choose a specific time if they want to do that .
So I'll click on pickup and then under the choose time , we can say something like later .
So today around 11 45 now remember how we set the condition where they have to order at least 60 minutes or I think it's like 90 minutes in advance .
So right now it's 10 30 for me .
So let's say , for instance , um I mean , let's just do something practical , you know , tomorrow at like uh you know 12 p.m. or they can just order now and uh click on save and then payment method .
So we haven't gone over payment method just yet .
But for now , we'll just do cash and then I'll click on save .
So I'm just telling them basically that I want to come in tomorrow at 12 o'clock and I'll pay cash and here I'll place the order for pickup next .
It's going to place the order where you're going to approve it on your smartphone or in your email inbox .
Once approved , the customer will get a notification in their email inbox and they'll receive this beautiful screen where it'll tell them that their order is confirmed and they can pick up their order from 30 minutes from .
We put like tomorrow at 12 o'clock , right ?
Something like that .
So that's just an example of if you want people to order it in the future , you don't have to add that feature , but that's if you decide to have that .
So congratulations , people can now order on your website .
Now remember if you want people to basically order within a certain time frame , which makes a lot more sense .
You can go back to your menu ordering and go to get started .
So I had the option of ordering ahead in the future and they can order like at 34 or 5 a.m. That might not be practical for everybody depending on what hours you serve .
So for example , right , here under the order for later or ?
I'm sorry , the , uh , was it the opening hours we can do something like , uh , you know , something practical here .
So , something from , uh , what is it , something from something from 10 a.m. to something like , uh , you know , because who delivers at three in the morning ?
You know .
So , uh , there we go .
So that's , that's fair .
Right ?
10 to 10 .
So , uh , if someone orders for later , they can only order within the times of 10 a.m. to 10 p.m. So this is how you can always adjust things and kind of modify it to fit your restaurant needs .
Next , let's talk about the booking and then we'll talk about how to fix this and then we'll talk about how to accept payments on this website .
So for table reservations , I will click here and I'll say how many people remember ?
We have two and the maximum is eight , right ?
So I'll just say four people we can select the time .
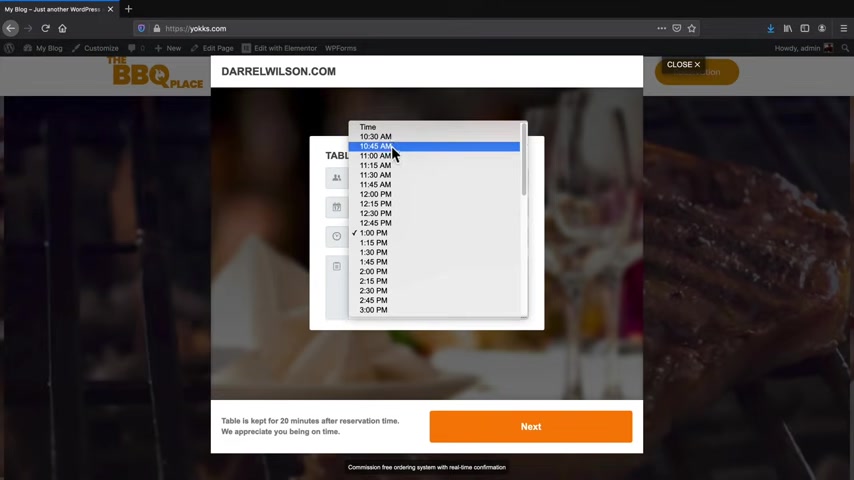
So I'll just say , you know what , uh Wednesday at , um , at uh , 1 p.m. you notice here how the time's changed , how it's not 24 hours anymore because we change that in the option .
So it only goes from 10 o'clock to 10 o'clock , but I'll just do something like uh one o'clock and then I will click on next and say , would you like to order ahead ?
No , that's ok .
We'll order in the restaurant .
That's a little bit too much , right ?
So let's click on place table reservation .
Now , now , as the business owner you'll receive an email saying , do you want to approve this reservation and you can approve it or not ?
So just make sure to check your email inbox and then that's all good to go .
All right .
Now , one thing I wanna do before I go on to the next section is I want to show you how to change this little box , how it's kind of looking weird right there .
So you can actually manipulate these icons even though they don't give you the option .
So let's click on edit element to and we have this short code .
So the short code is just a bunch of gibberish right here .
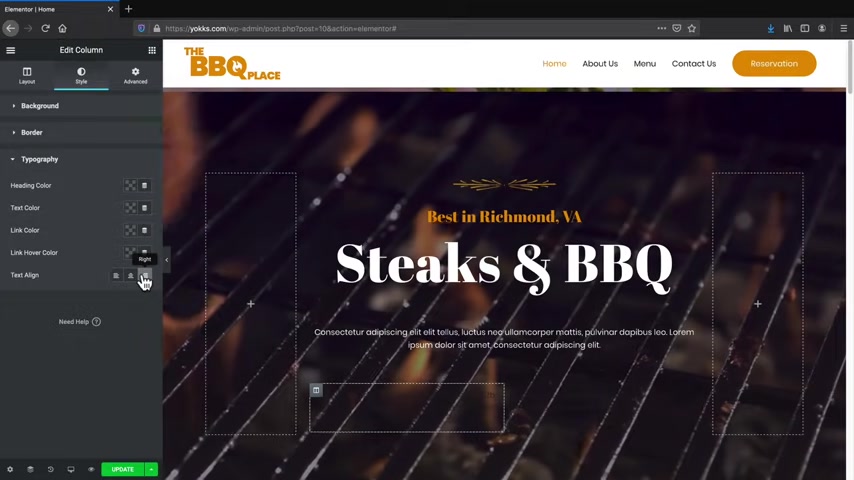
So what we'll need to do is we'll go on over to advanced and I will simply go ahead and find OK .
So let's go to our column right here and I'll click on this little icon and on the style section , we are going to see topography under topography under the text line .
I will put this to the rights .
So now what it's doing is that it's basically taking that same column and applying it to the right side to make it look a little bit more even .
So let's click on updates and now let's go to view the page and see what changes are made to our websites .
And now it looks really professional .
It's aligned perfectly and it just looks great .
So I've saved the best for last .
So now that I've shown you all how to accept orders on your website , let's talk about how you can accept payments with your online ordering website .
Ok .
So in this last part of the video , I'm gonna show you all how to integrate payment methods like paypal and stripe onto your website so you can start accepting payments on your websites .
Now , I'm gonna go to my dashboard here really quick .
You remember the account that you use to log in ?
Now , when you first started this application , you created a uh a user name and a password or an email and a password .
Now , we're gonna take that same email and password and we're gonna go to Gloria food dot com .
Now there is a link below to Gloria food dot com and once you're here , you'll click on log in .
Now , remember the same information that you use to log in right here .
You'll go ahead and put right here .
So I'll go ahead and use the same log in information and click on login if you're not sure , just go back to the other , uh or just just check it out , you check your email and you should be able to find something there .
Now , there's other options that you get , you get with this .
So there's uh Kickstarter , there's website quality and there's just other issues .
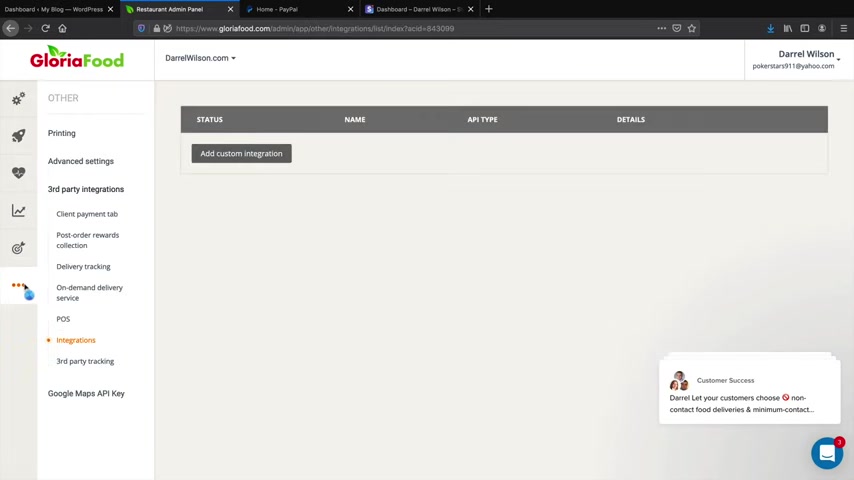
Now , we already connected our websites with Gloria Food .
The only thing that we need to do here is we need to go ahead and go to the settings tab and we need to go to payments , taxes and legal .
I'm sorry , the payment methods .
So we want to make sure that these are all checked right here .
So these are all checked , then we can go ahead and go on to the next section on the bottom part right here .
We have payments and we have online payments .
So if you want to accept credit cards , you will need to pay for this service .
So uh what I'll do here is say , yes , I want to accept and I'll click on .
Yes .
Now they're saying , do you want to provide or do you want to accept credit cards ?
Now , we're gonna use Stripe and Stripe is the easiest method to use out there .
And for those of you who are in other countries and Stripe is not available , we are also going to integrate paypal as well .
So uh once you have those two set up , you'll click on next .
All right .
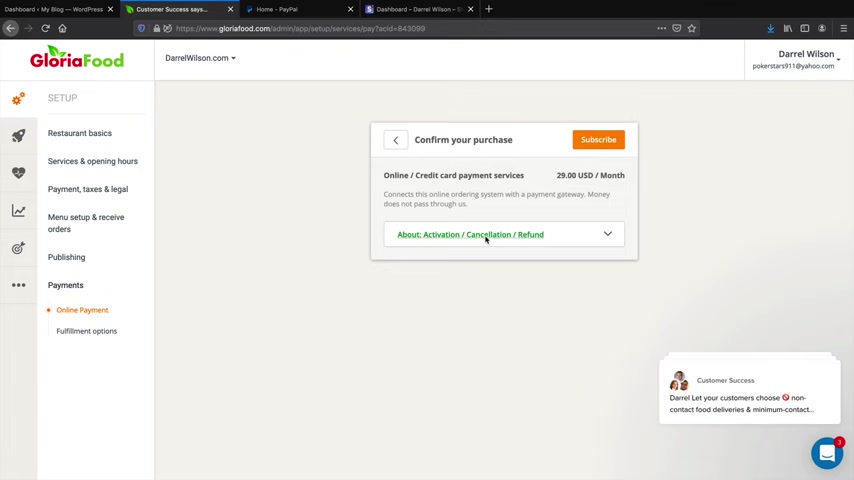
So the fee for the service guys is $29 a month and that's really not bad at all because um they're just basically the middle person and they are not holding your money .
They're just allowing it to pass through and they are going to give it to payment merchants like um payment merchants like Stripe and paypal .
So I just want to be clear on that .
They will not be , you will not be withdrawing money from this application .
They are just going to offer the service through their application .
So go ahead and click on , subscribe .
Now , I'm gonna go ahead and subscribe to this same service and then once I'm done with this billing information and paying for it , I'll meet you on the very next page .
All right .
Awesome .
So once you pay for it , you'll be brought to this screen right here where your payment was successful .
So click on , let's do it .
So the great part is Stripe and paypal are completely free to sign up .
So what you'll have to do is going over to stripe dot com and you'll go to create an account .
So you'll go to the process , the verification process of creating an account .
Now , remember , Stripe is completely free .
So there is no startup cost and it doesn't cost you anything to get started .
You will need a bank account and that's pretty much it .
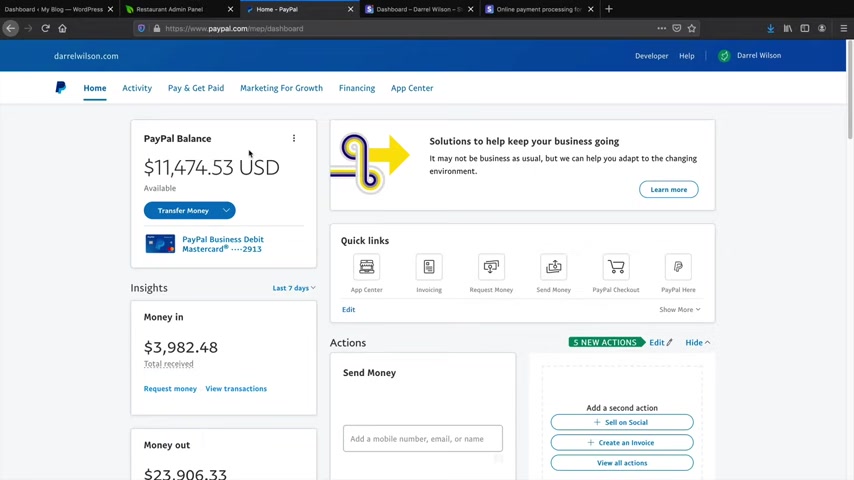
Alternatively , you can also go to paypal dot com .
So paypal dot com again is another free service and you'll need to sign up with a business account .
So when you first sign up , there is two accounts that you can use to sign up with .
So you'll see this screen right here .
It is a personal account and a business account .
You will need to select a business account and this will basically allow you to accept payments as a business because you'll need to enter an API key and you're only given that A P I key if you sign up with a business account .
Now , I have a business account for paypal already and I also do have a Stripe account as well .
So I'm gonna walk you through both processes just to make sure that you know how to set up payments for your websites .
So first we'll set up Stripe .
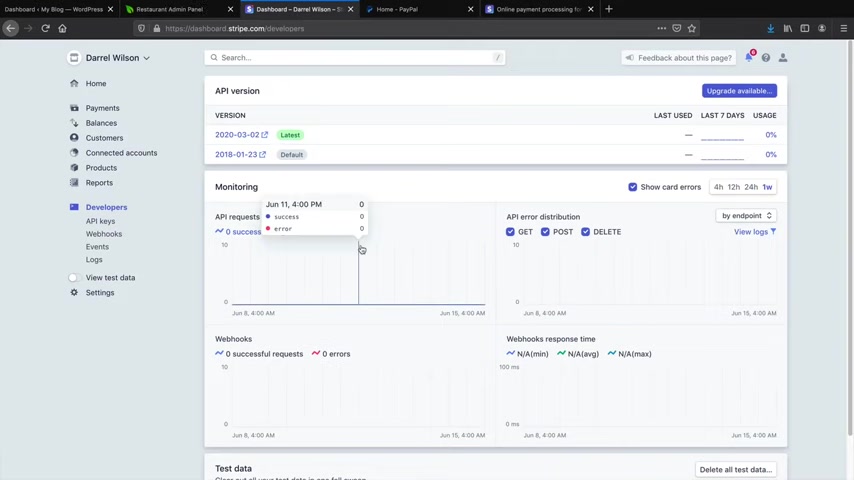
So once you go through the verification process with Stripe , it's actually really , really easy to get this set up on your website .
So you have all these options on the left side .
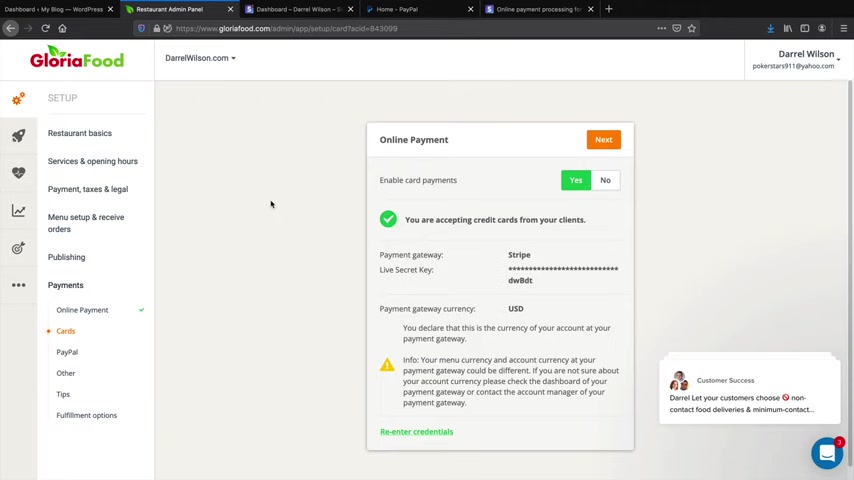
All you have to do is click on API keys and then right here you have your secret key , click on reveal live , secret key and copy that .
You'll go back to your admin panel and then just paste that and you are done .
So whatever you get paid through your website , it'll go to your Stripe account and Stripe will automatically deposit that money into your bank account automatically .
Now you can set it to get transferred daily , weekly monthly .
It really depends on your Stripe settings .
And that's why Stripe is like the number one online merchant service because it's super convenient .
You don't have to call anybody .
It's all already done for you .
So whenever someone pays you now with the credit card , it will go directly to your Stripe account .
So congratulations , you have now set up credit cards on your websites .
All right .
Awesome .
So my account has been successfully connected and now I can start using Stripe .
Now , let's go ahead and use paypal because sometimes people like to use paypal .
So right here you'll see payments and then you'll see paypal .
Go ahead and click on paypal .
Now it's gonna ask you for your client ID and your client secret ID .
So again , you will need a paypal Business account .
And um what you'll do is once you make the account , you'll see this login to developer dot paypal dot com .
Go ahead and click on that right there .
I'll go ahead and log into my account .
Ok ?
So we're ok .
So we're at paypal developer .
Now , once you log in and again , you can use this little link to login , you'll simply go to your name and then go to dashboard .
Now you're gonna go ahead and find your API I'm sorry , your a your apps and credentials .
What you'll do next is you'll simply go ahead and create an app .
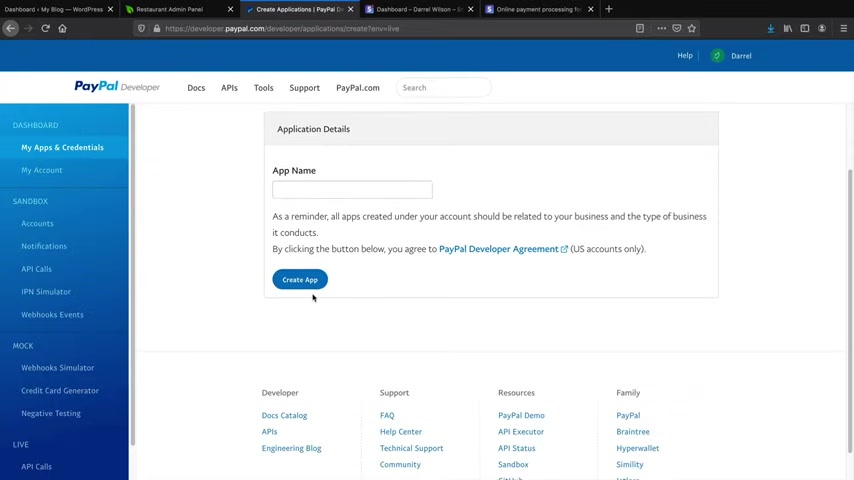
Now , sandbox is basically testing and live is real websites .
So what you'll do is just click on create an app and give up a name .
So I'll just do the food website , create the app and that's it .
We're all done .
So all you need to do at this point now is go ahead and paste the client ID right there .
So here is the client ID I'll go ahead and copy this and I'll paste it right there .
I will go ahead and paste that in there and then I will connect paypal with my websites .
And congratulations .
We are now accepting paypal from your client .
So our website right now is a live website where we can start accepting payments and people can order on our website right now .
So let's go ahead and test all the hard work that we have done so far .
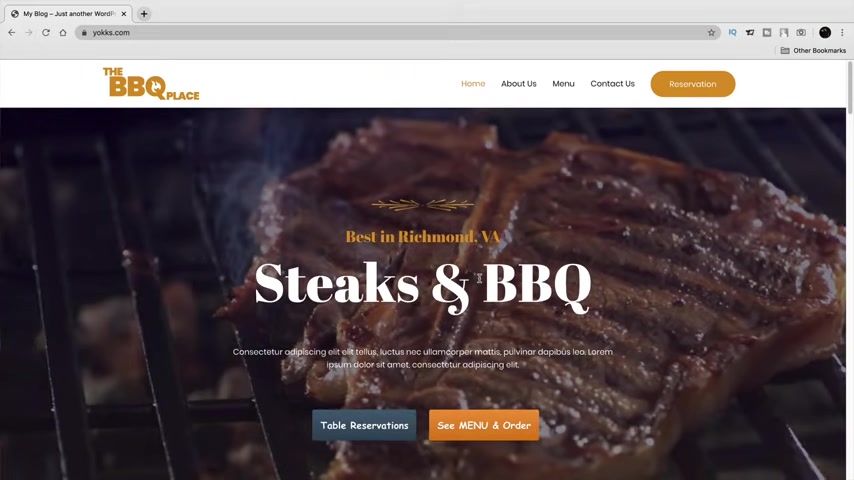
So at this point , we have a fully functional online ordering food website where people can come to the website , use their credit card and purchase and order stuff right away on the website .
So let's go ahead and test it out .
So here I'll click on the sea menu and order and let's just order something .
So let's order a Wilson dog here .
I'll go ahead and select a large Wilson dog with a large combo for $10 and that's pretty much it .
I'm not gonna go crazy because I'm actually using my own credit card here .
So here I'll click on add to cart now again .
Right here .
You'll see that .
Um , everything looks good .
I didn't have to change the orders because right now guys , it's almost 12 at midnight .
So , uh , the original store that we set was for 10 p.m. So I had to go ahead and change those settings .
Uh , once we're done with that .
Oops , sorry about that .
I closed that once we're done with ordering that .
I'll click on the cart and I'll just go ahead and fill out the information under the contact .
All right .
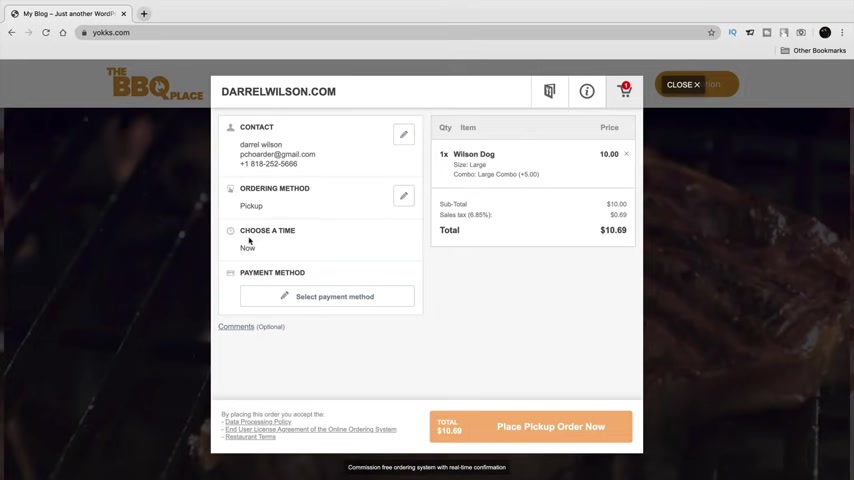
And then the ordering method , I'll go ahead and say , you know what I want this to be for a pickup .
I'll save that .
Choose a time now and then for the payment method , I'll go ahead and select a payment method .
So here we have cash card to pick up call back card or paypal .
So we can use paypal or we can use a card .
I'll go ahead and use my live credit card on this video to show you that this is a fully functional online food ordering website or is that how you say it online food ordering website ?
All right .
So it looks like we are all ready to go .
So I just added my credit card here and then I will click on place pickup order now .
So right now I'm going to approve the order on my phone or via my email .
So I'm on my phone right now and I just got the order .
So it's the same price , $10.69 .
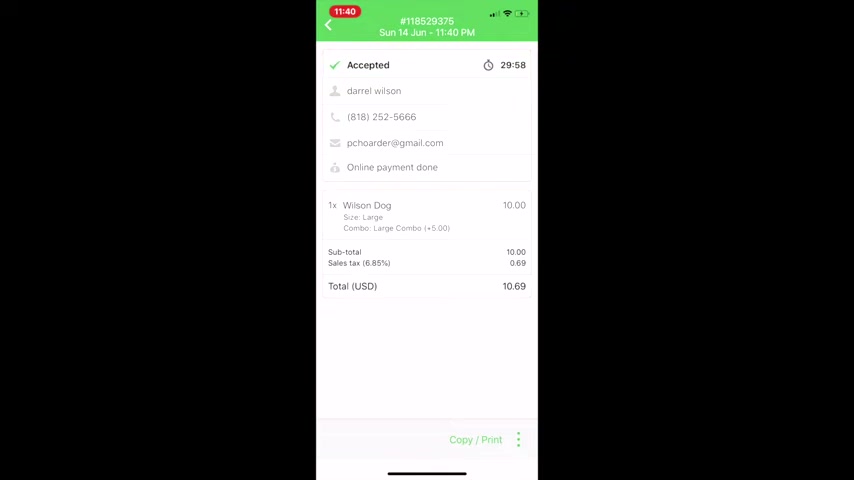
So I will go ahead and approve this order and once it's approved by the restaurant , we will then get a notification letting us know that the order is approved and everything is all good to go .
So the order was approved and we can pick it up in 30 minutes .
So Congratulations .
This website and tutorial is basically done .
Now , let's just go ahead and quickly go to our Stripe account to see if that money went to our Stripe account .
So I'm at my Stripe account and the payment was captured .
So right here in our payments , you'll see that we got an order for $10.69 and this money will go directly into my bank accounts .
So that's pretty cool .
So , at this point , guys , you are all done .
I've showed you all how to create the website .
I've showed you how to modify it , make changes and then I've showed you how you can accept payments on your new website .
I really , really , really hope this is to help you out .
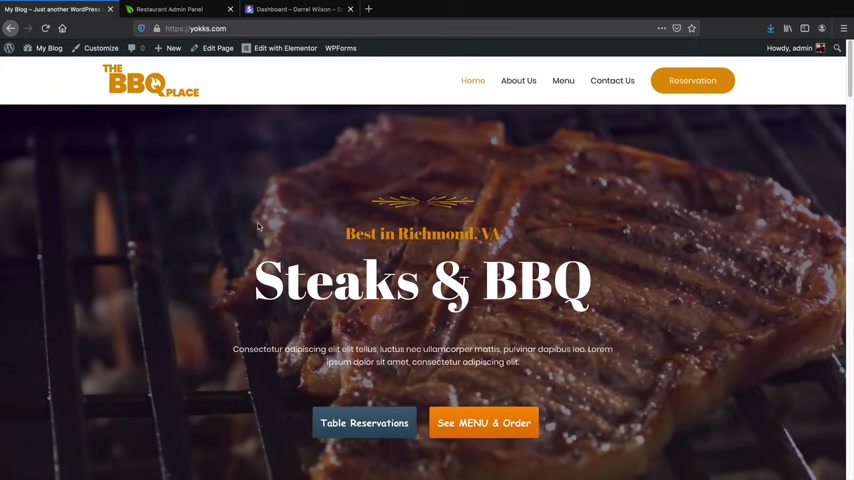
If you guys have any questions , please feel free to let me know in the comments below .
Also , be sure to check out the Elementary Pro video and I will leave a link below to purchase Elementary Pro if you decide to go that route and just give your site a lot more functionality .
My name is Darrell Wilson .
I wish you all the best and I will see you guys all in my next video .
Guys .
Take care .
Are you looking for a way to reach a wider audience and get more views on your videos?
Our innovative video to text transcribing service can help you do just that.
We provide accurate transcriptions of your videos along with visual content that will help you attract new viewers and keep them engaged. Plus, our data analytics and ad campaign tools can help you monetize your content and maximize your revenue.
Let's partner up and take your video content to the next level!
Contact us today to learn more.